This was a really entertaining and effective team event. The participants created their own 'Ultimate Cupcake' from a variety of different flavoured cakes, fillings and icings. Then they tasted them and picked the best to represent each of their teams. After naming the cupcake they had to brainstorm a brand including shops, packaging, pitch and slogan. The winning cupcake was delicious. It was a banana cake filled with peanut butter and topped with chocolate buttercream. They named it 'Chunky Monkey'. This was their leaping off point for the brand. This was their pitch- 'Man cakes, not fairy cakes. Cakes for men, real men. Men with beards.' Their concept was a chain of shops looking like caves with vines and monkeys hanging from the ceiling. The customers would be served by men in loincloths with, you guessed it, beards! The whole room was in hysterics by the end and there was no doubt that they would take home the prize. They got a copy of my recipe book as well as a Cookie Girl branded cake decorating kit each. If you want to do a similar event then call us on- 020 3573 9135
Unilever Cake Class Client Event
This was an event that we hosted for Unilever and their clients. As you can see they found it a huge amount of fun and a really bonding experience. They loved the fact that we organised the whole event for them. This meant that the could have their drinks, cake workshop and supper all at the same venue (the fabulous Crusting Pipe in Covent Garden). We provided everything that was required for the event, leaving them free to relax, chat and get to know each other better. They were thrilled with how much they accomplished with their piping and decorating. Plus they all went away with boxes of their lovingly created cupcakes. The memories of the event will stay with them long after the cakes have been demolished and they will be able to test out their new found skills every time they have an office bake sale.
If you would like to experience one of our workshops or for us to create something bespoke for you then do let us now- info@cookiegirl.co.uk.
Jess' Baby Shower
I literally adore my sister in law.
She is one of loveliest people I know.
In fact, I met here before my brother in law, on a hen in Ibiza.
She was performing on stage with Leftfield and we were
hypnotised by her.
When she turned up at our villa later that night (or morning by then!)
I got chatting with her and realised that she is a great beauty inside and out.
I had one of those rare moments where you meet someone and just think
‘Wow you're amazing. How do I get you in my life?’
And then my brother in law met her (not through me) a few months later and clearly
thought exactly the same!
They have been together a few years and are now expecting their first baby
together. Very exciting. So obviously I offered to do the cake table. And also host
the party. It was a great event. There where probably around 60 or 70 people there.
I made a ‘Cuddly Toy Sheep Cake’, This was the same technique as I used for Teddy’s
1st birthday Teddy Bear Cake. ’ Baby Vest & booty biscuits’, ‘Bottle Biscuits’,
‘Baby Cakes’ and Bunting Cupcakes’. I also made some healthy fruit skewers.
It was a lot of work and a lot of fun. And I did have some help from my children. Although
some would say more hindrance….
Healthy Granola
I've always loved Granola until I realised how much sugar was in it. After a bit of experimenting I realised it wasn't difficult to create a healthy option. So here it is:
Ingredients: 500g rolled oats, 200mls soya or rice milk, 1 tbsp rapeseed oil, 1 tbsp honey/agave/ maple syrup, 100g nuts, 1 tbsp desicated coconut
Method: Place the oats in a large mixing bowl. Mix the milk, syrup & oil together until they are lightly blended. Pour onto the oats and mix together. You should find that you have damp clumps of mixture. Tip onto a baking sheet and spread out evenly. Place in the oven and bake for between 10 and 15 minutes. Keep an eye on them so they don't burn. Once they look golden and smell baked take them out and move them around in the tin to avoid burning. Sprinkle the nuts (I used cashews) on top. Put back in the oven and cook for another 7-10 mins until they are golden. Take the mixture out and allow to cool. Sprinkle on the coconut and tip the Granola into Kilner jars.
To make a simple but delicious desert; layer Greek yoghurt, Granola and soft fruits in a glass.
Fairy Cake
The cake table for Cosy Mae's 4th birthday party was fairy themed. I spent an evening making the sugarpaste head and body of the fairy, which I really enjoyed. The great thing about this is that you can do it well in advance as it will keep in a shoe box for a couple of weeks (or more). Just don't put it in a sealed container or it will melt due to the humidity. As I was pushed for time I kept the rest of the cake table quite simple. I used some flower cupcakes from my intermediate decorating class that I demoed the day before. I did a very simple & quick icing design on some butterfly, shortbread cookies. And I added some pretty party rings from the shop! The onl thing I wasn't thrilled with was the look of the fairies skirt. I let the kids help with it and as it was meringue frosting it really needed to be done quickly. Anyway they enjoyed doing it and it wasn't a total disaster as I think most people were looking at the top half! Next time I would do it in advance, on my own, to get that lovely swirly sheen. It should look more like satin. I'd let them do some cupcakes or something that was going to be less centre stage!
Pop Up Cake Stand at Expedia Company Event
Egencia through the looking glass was a fab event for the corporate arm of Expedia. It was a client event and our 'cupcake decorating stand' was a big hit. The were thrilled with how quickly they picked up the swirl techniques and it was the perfect finish to the delicious barbecue that everyone had indulged in. The Mad Hatter AKA was entertaining everyone with magic tricks and there were giant board games to play on. The sun shone and the views were incredible. A memorable event and a great time had by all.
What is the most fun activity that you've done at an event?
Cupcake Decorating Class
Our 2hr cupcake decorating class is the perfect entry level of you if you want to get started learning with us. It is also ideal for hen parties, baby showers, team building events and birthday parties.
We have lots of people come with their mums, Grans and sisters or friends. Although, as we pride ourselves on our friendly and relaxed atmosphere, those who come on their own usually leave feeling that they have made new friends by the time they leave.
You will learn how to make 4 different swirls and then you will discover a huge range of sprinkles to decorate your cupcakes with. We provide the everything that you need for the event.
These classes are very popular and run from 11am to 1pm most Saturday.
Woodland Themed Birthday Party
Teddy is mad about owls so this inspired me to do a 'Woodland Themed' cake table for her 3rd birthday. The great thing about this one is you can use lots of natural coloured products such as mini pretzels, twiglets, crisps & breadsticks. This means that you are giving the little ones some healthy snacks and saving yourself from having to create/buy too many sweet treats.
The mushrooms were simply marshmallows topped with a strawberry and piped with dots of Royal icing. The hedgehog cakes were cupcakes covered in cream buttercream and then piped with chocolate buttercream (using a grass nozzle) to cover 3/4 of them leaving just enough space to pipe on eyes and a pointy nose.
The biggest challenge was the owl cake. I baked 2 x 1.5 ltre pudding basins using a 14 oz mix of Victoria Sponge (ie 14oz butter, 14 oz sugar, 7 eggs & 14oz self raising flour). I baked this at 170 for around 90 mins (check after 1 hr as ALL oven temps vary).
You will need- Buttercream (made with 10oz soft unsalted butter and 20oz icing sugar, beat for 5 mins) colour 1/3 cream, 2/3 brown, orange, black, green & white fondant icing, 2 leaf nozzle (I used a PME 53).
Cover the cake board with the rolled green icing. Crumb coat both cakes with a thin layer of buttercream. Secure one of the cakes in the centre of the board with a blob of buttercream. Place the other cake on top, flat side up. Use wooden skewers at an angle to hold the top one in place. Add more buttercream to the centre where the cakes meet to create the owl shape. Now pipe on the feathers in rows following the design above. Once the cake is covered you can add the beak, eyes and feet as above. I mixed a bit of the brown and the cream icing together to make the pale brown colour for the ears. I then just piped them on using the same feather technique.
If you would like to create this or something similar in a one to one private lesson with me then call- 020 3573 9135
Dinosaur Cake
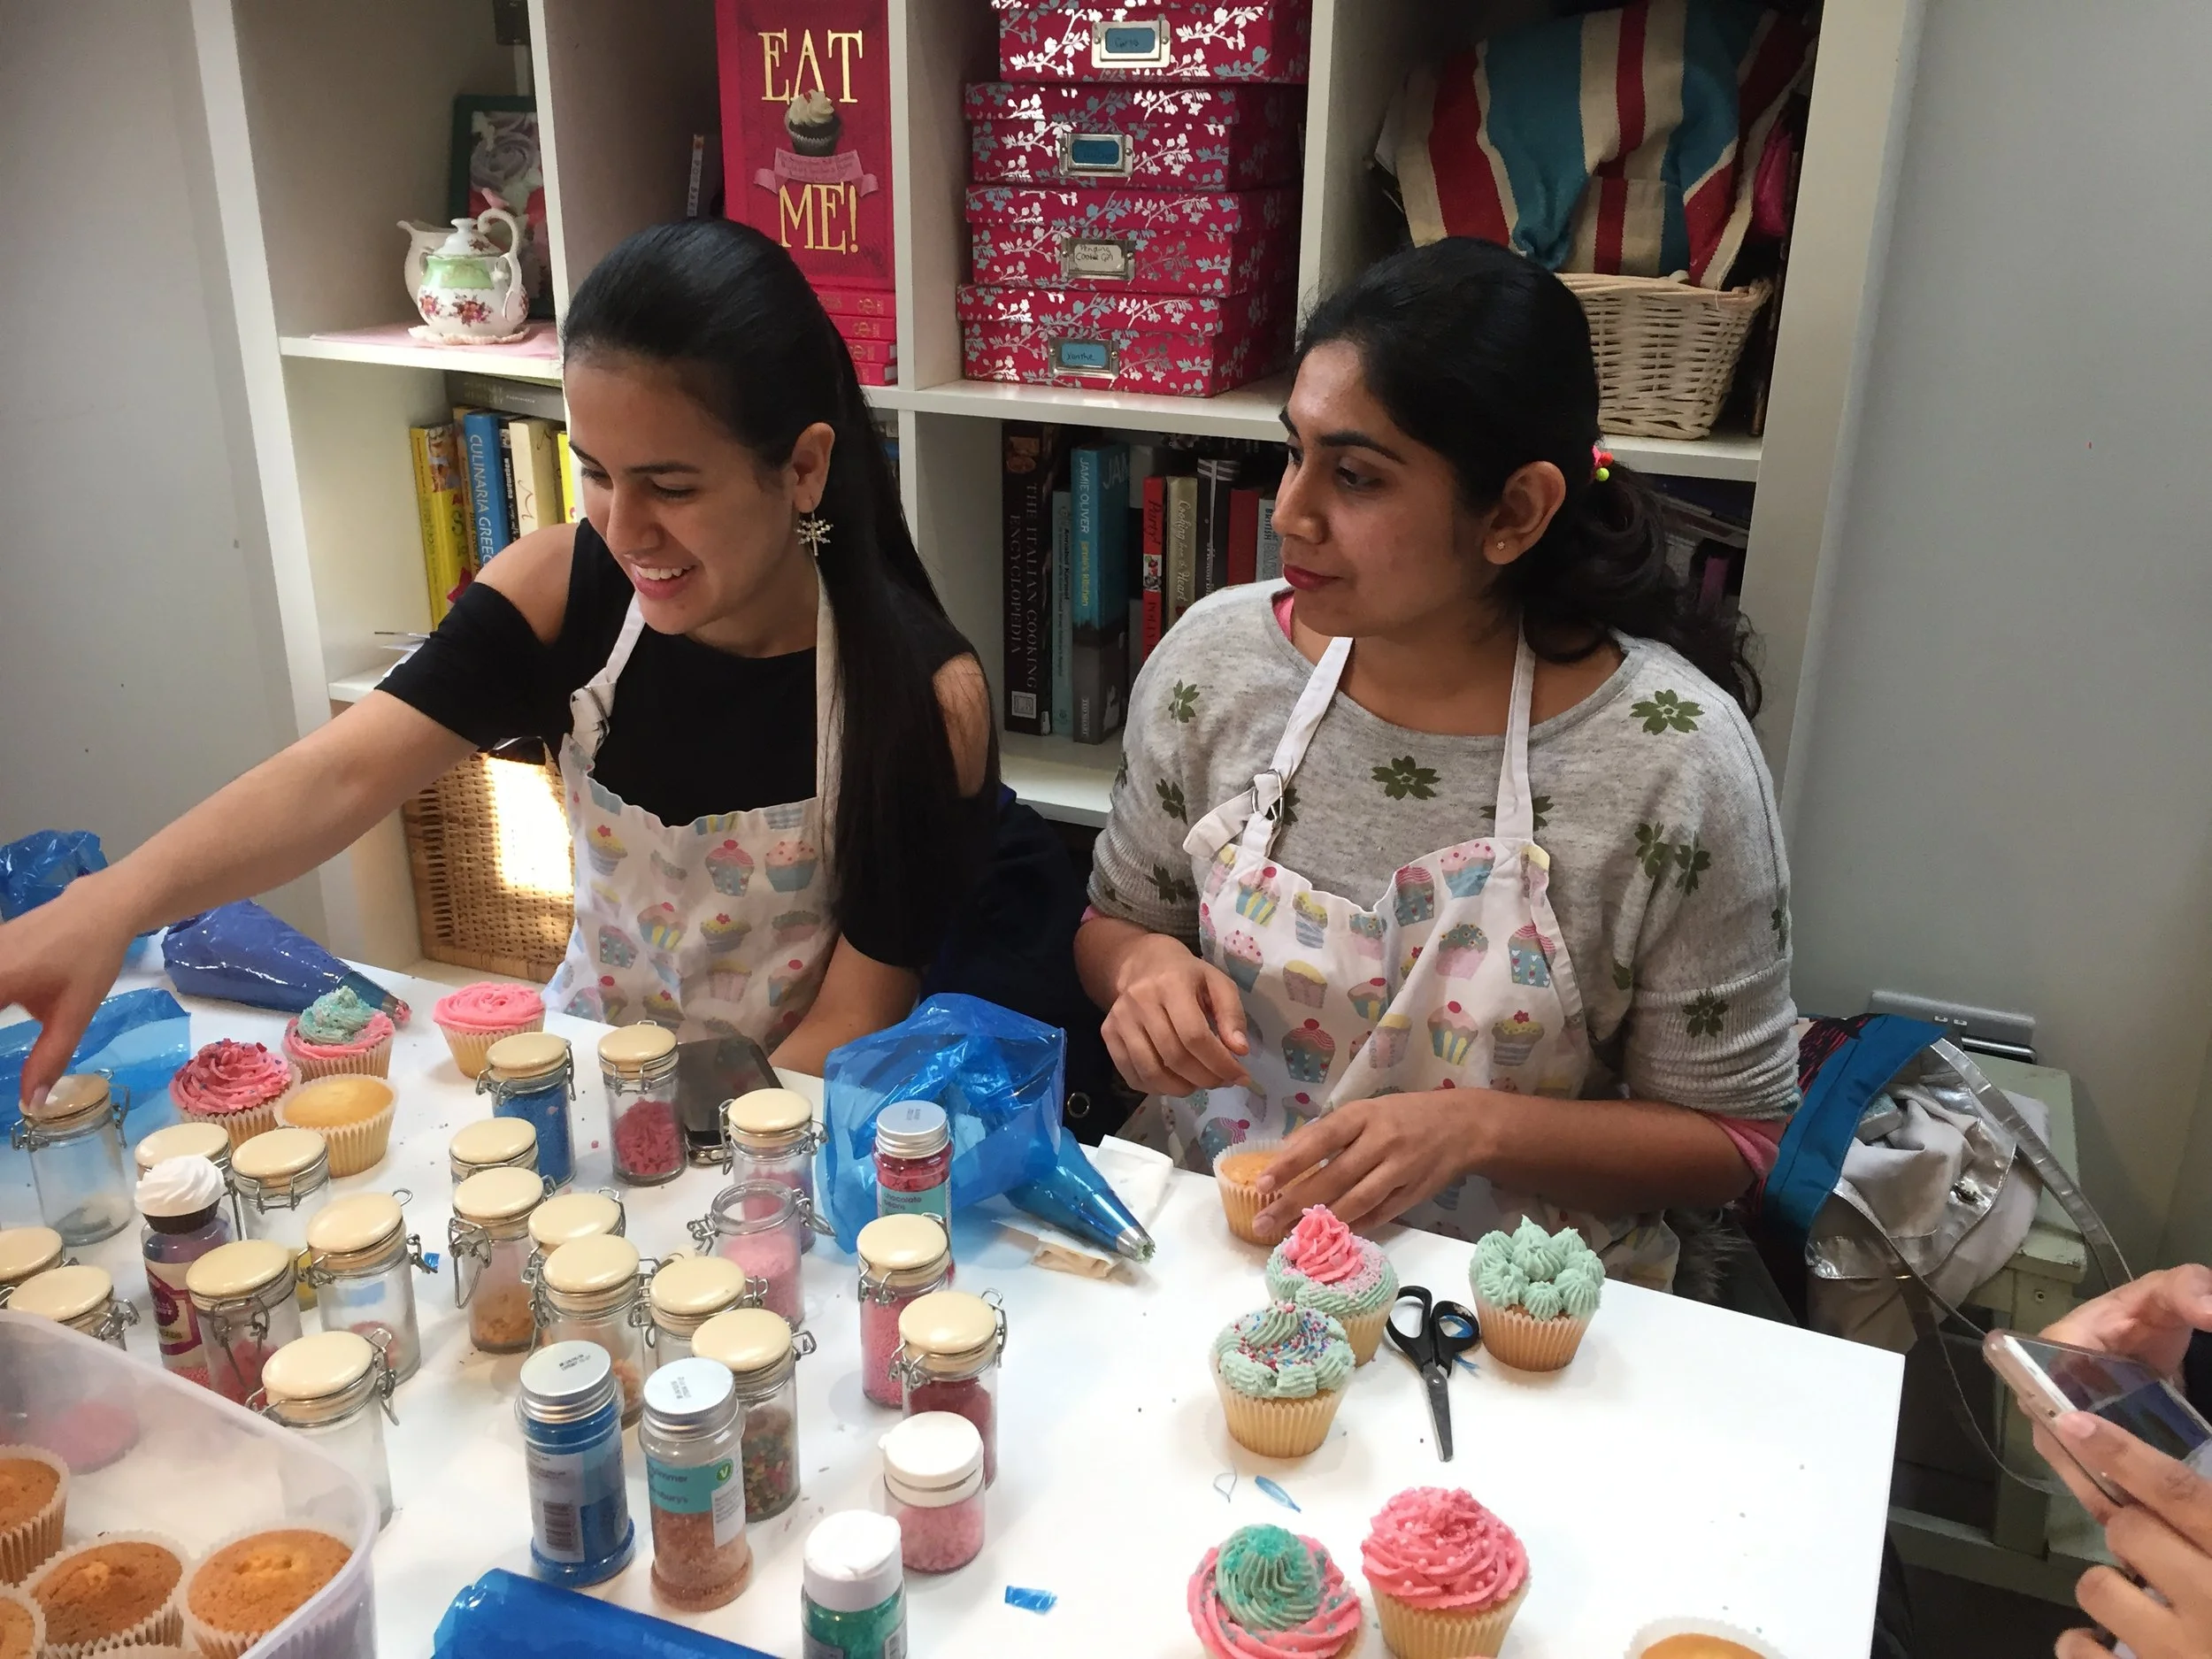
As you may have noticed there are a few signature details with my kids cakes.
1. I like to create 3d cakes, rather than flat so I work with pudding basins. One 1.5 ltr & one 0.5 ltr.
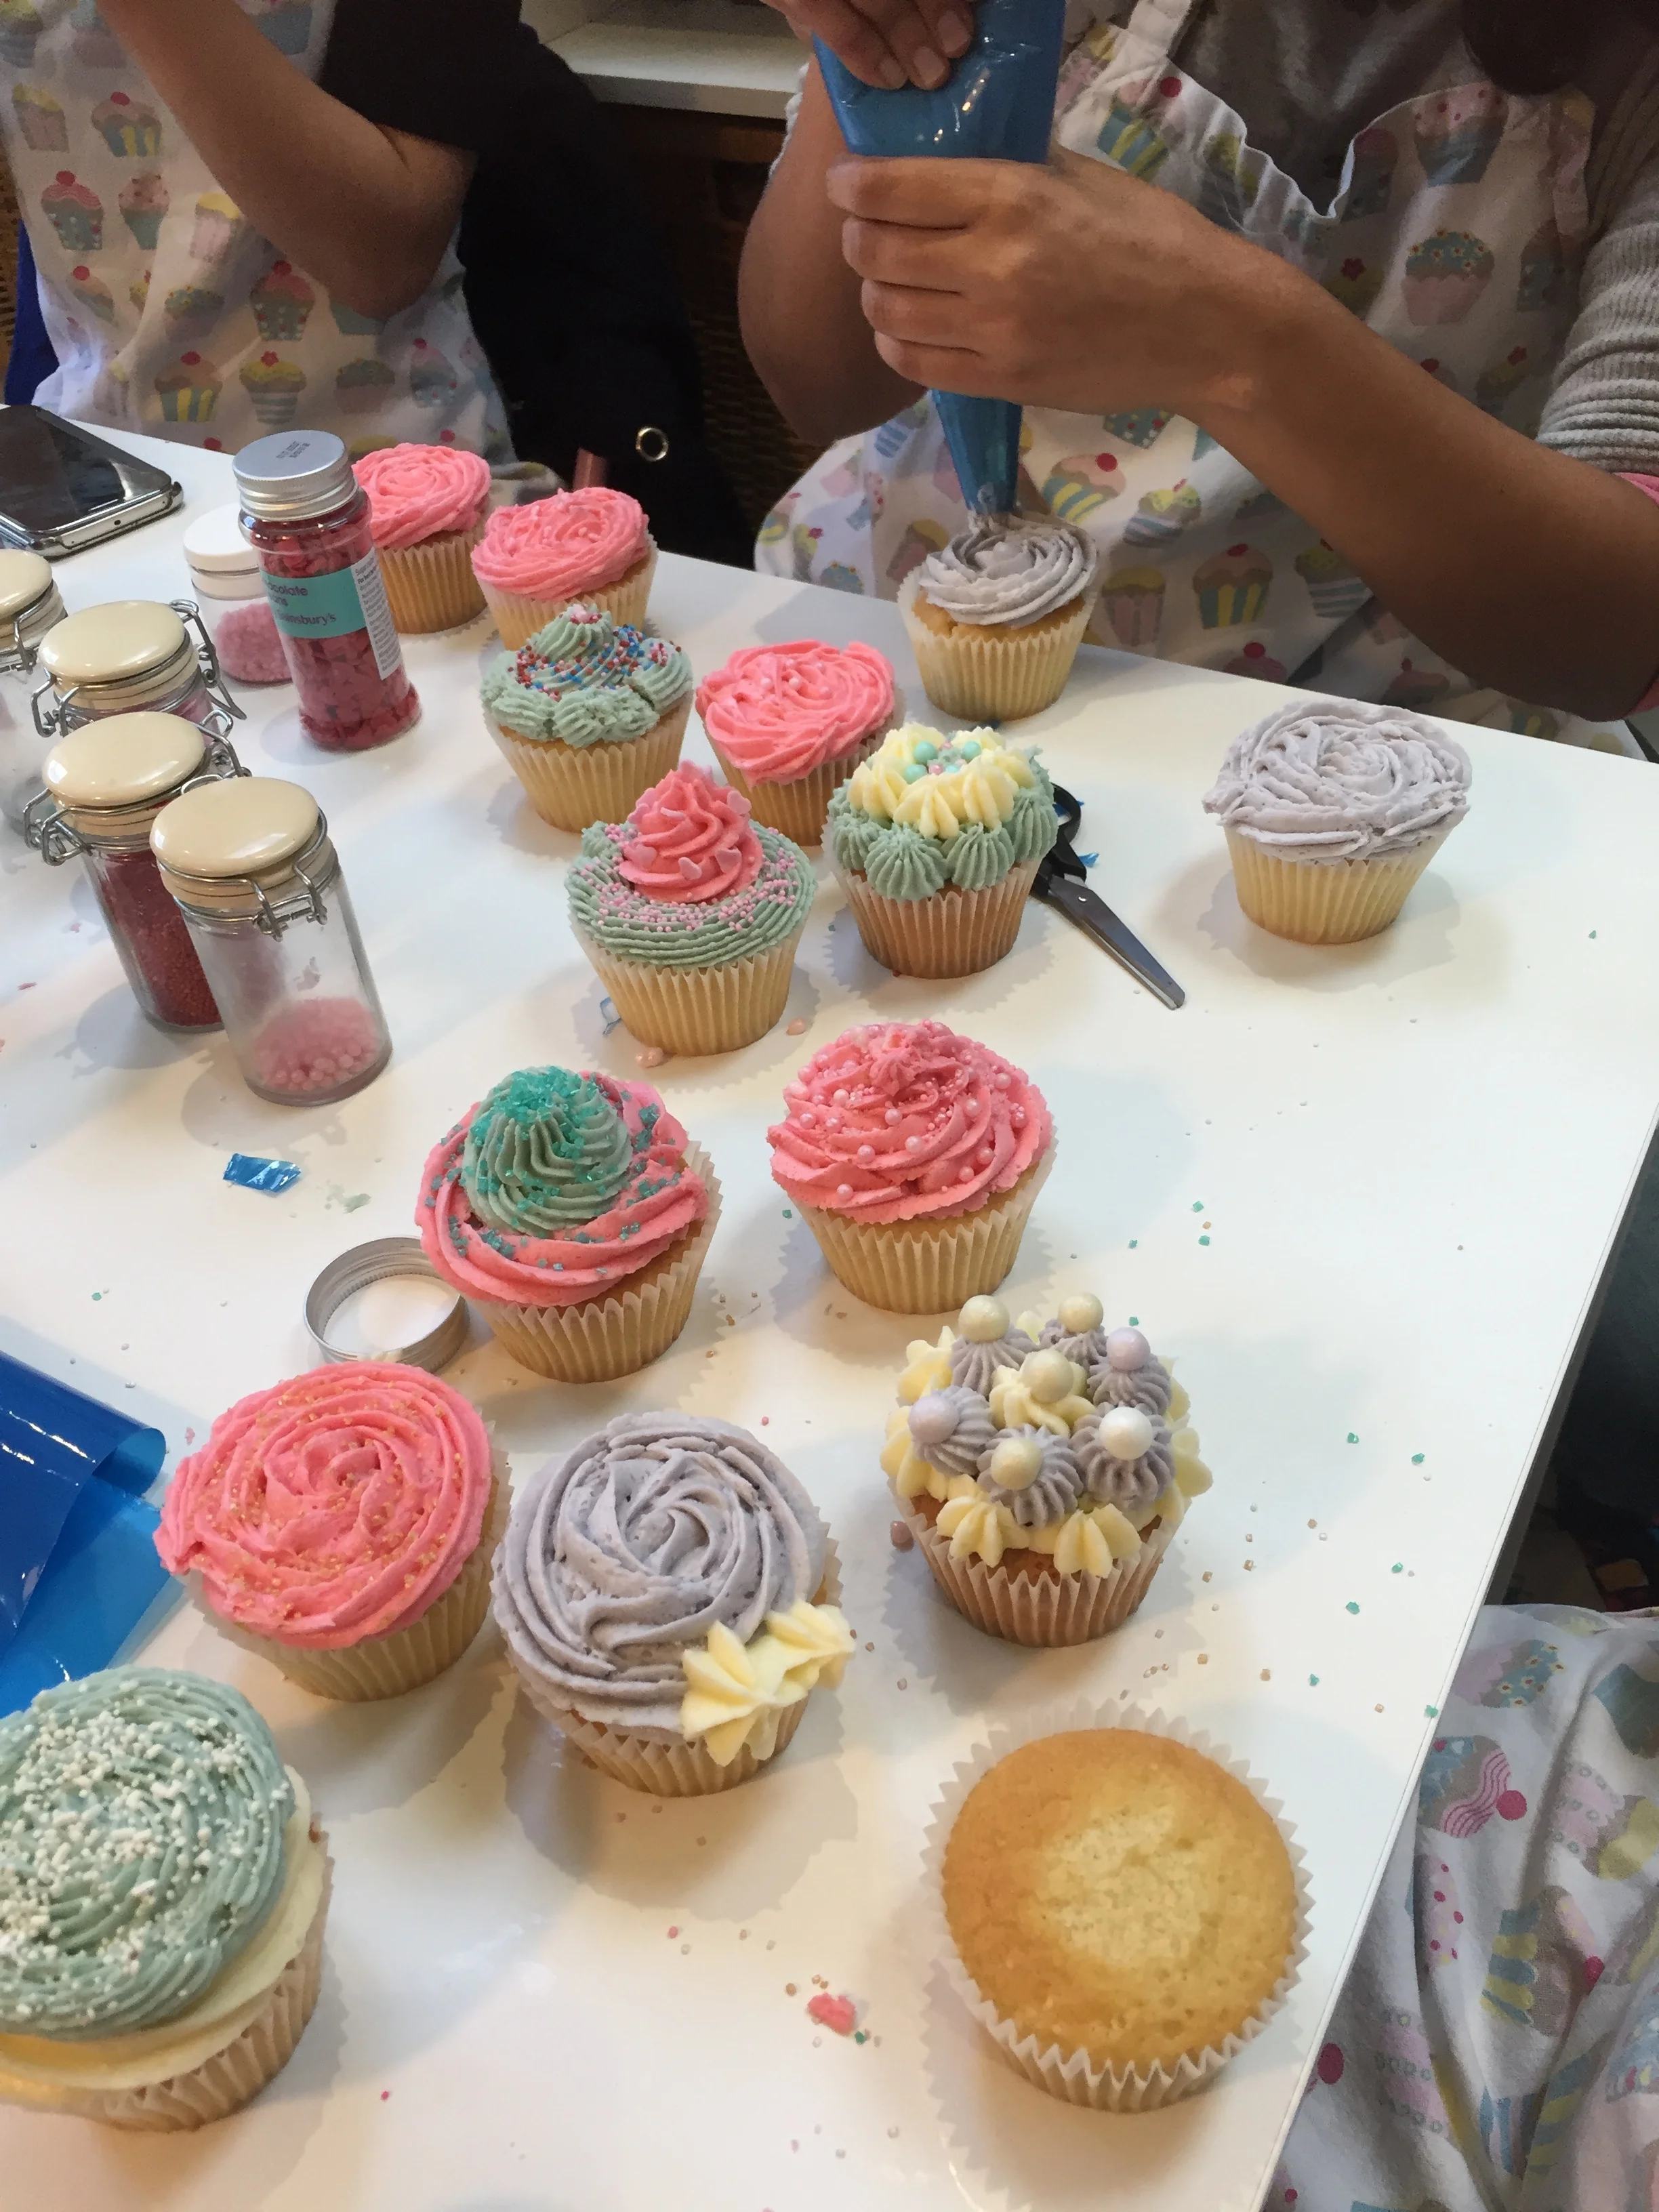
2. I work in buttercream as I prefer the texture and I much prefer the taste to fondant.
3. As I'm so busy I generally only create a cake once. I don't sell them so they are just for my kids/Godkids. The prototype, which I make up as I go along, is the one in the photos. This means that they are not perfect but I like that the look hand made. Hopefully that also encourages non professional bakers/decorators to give them a go.
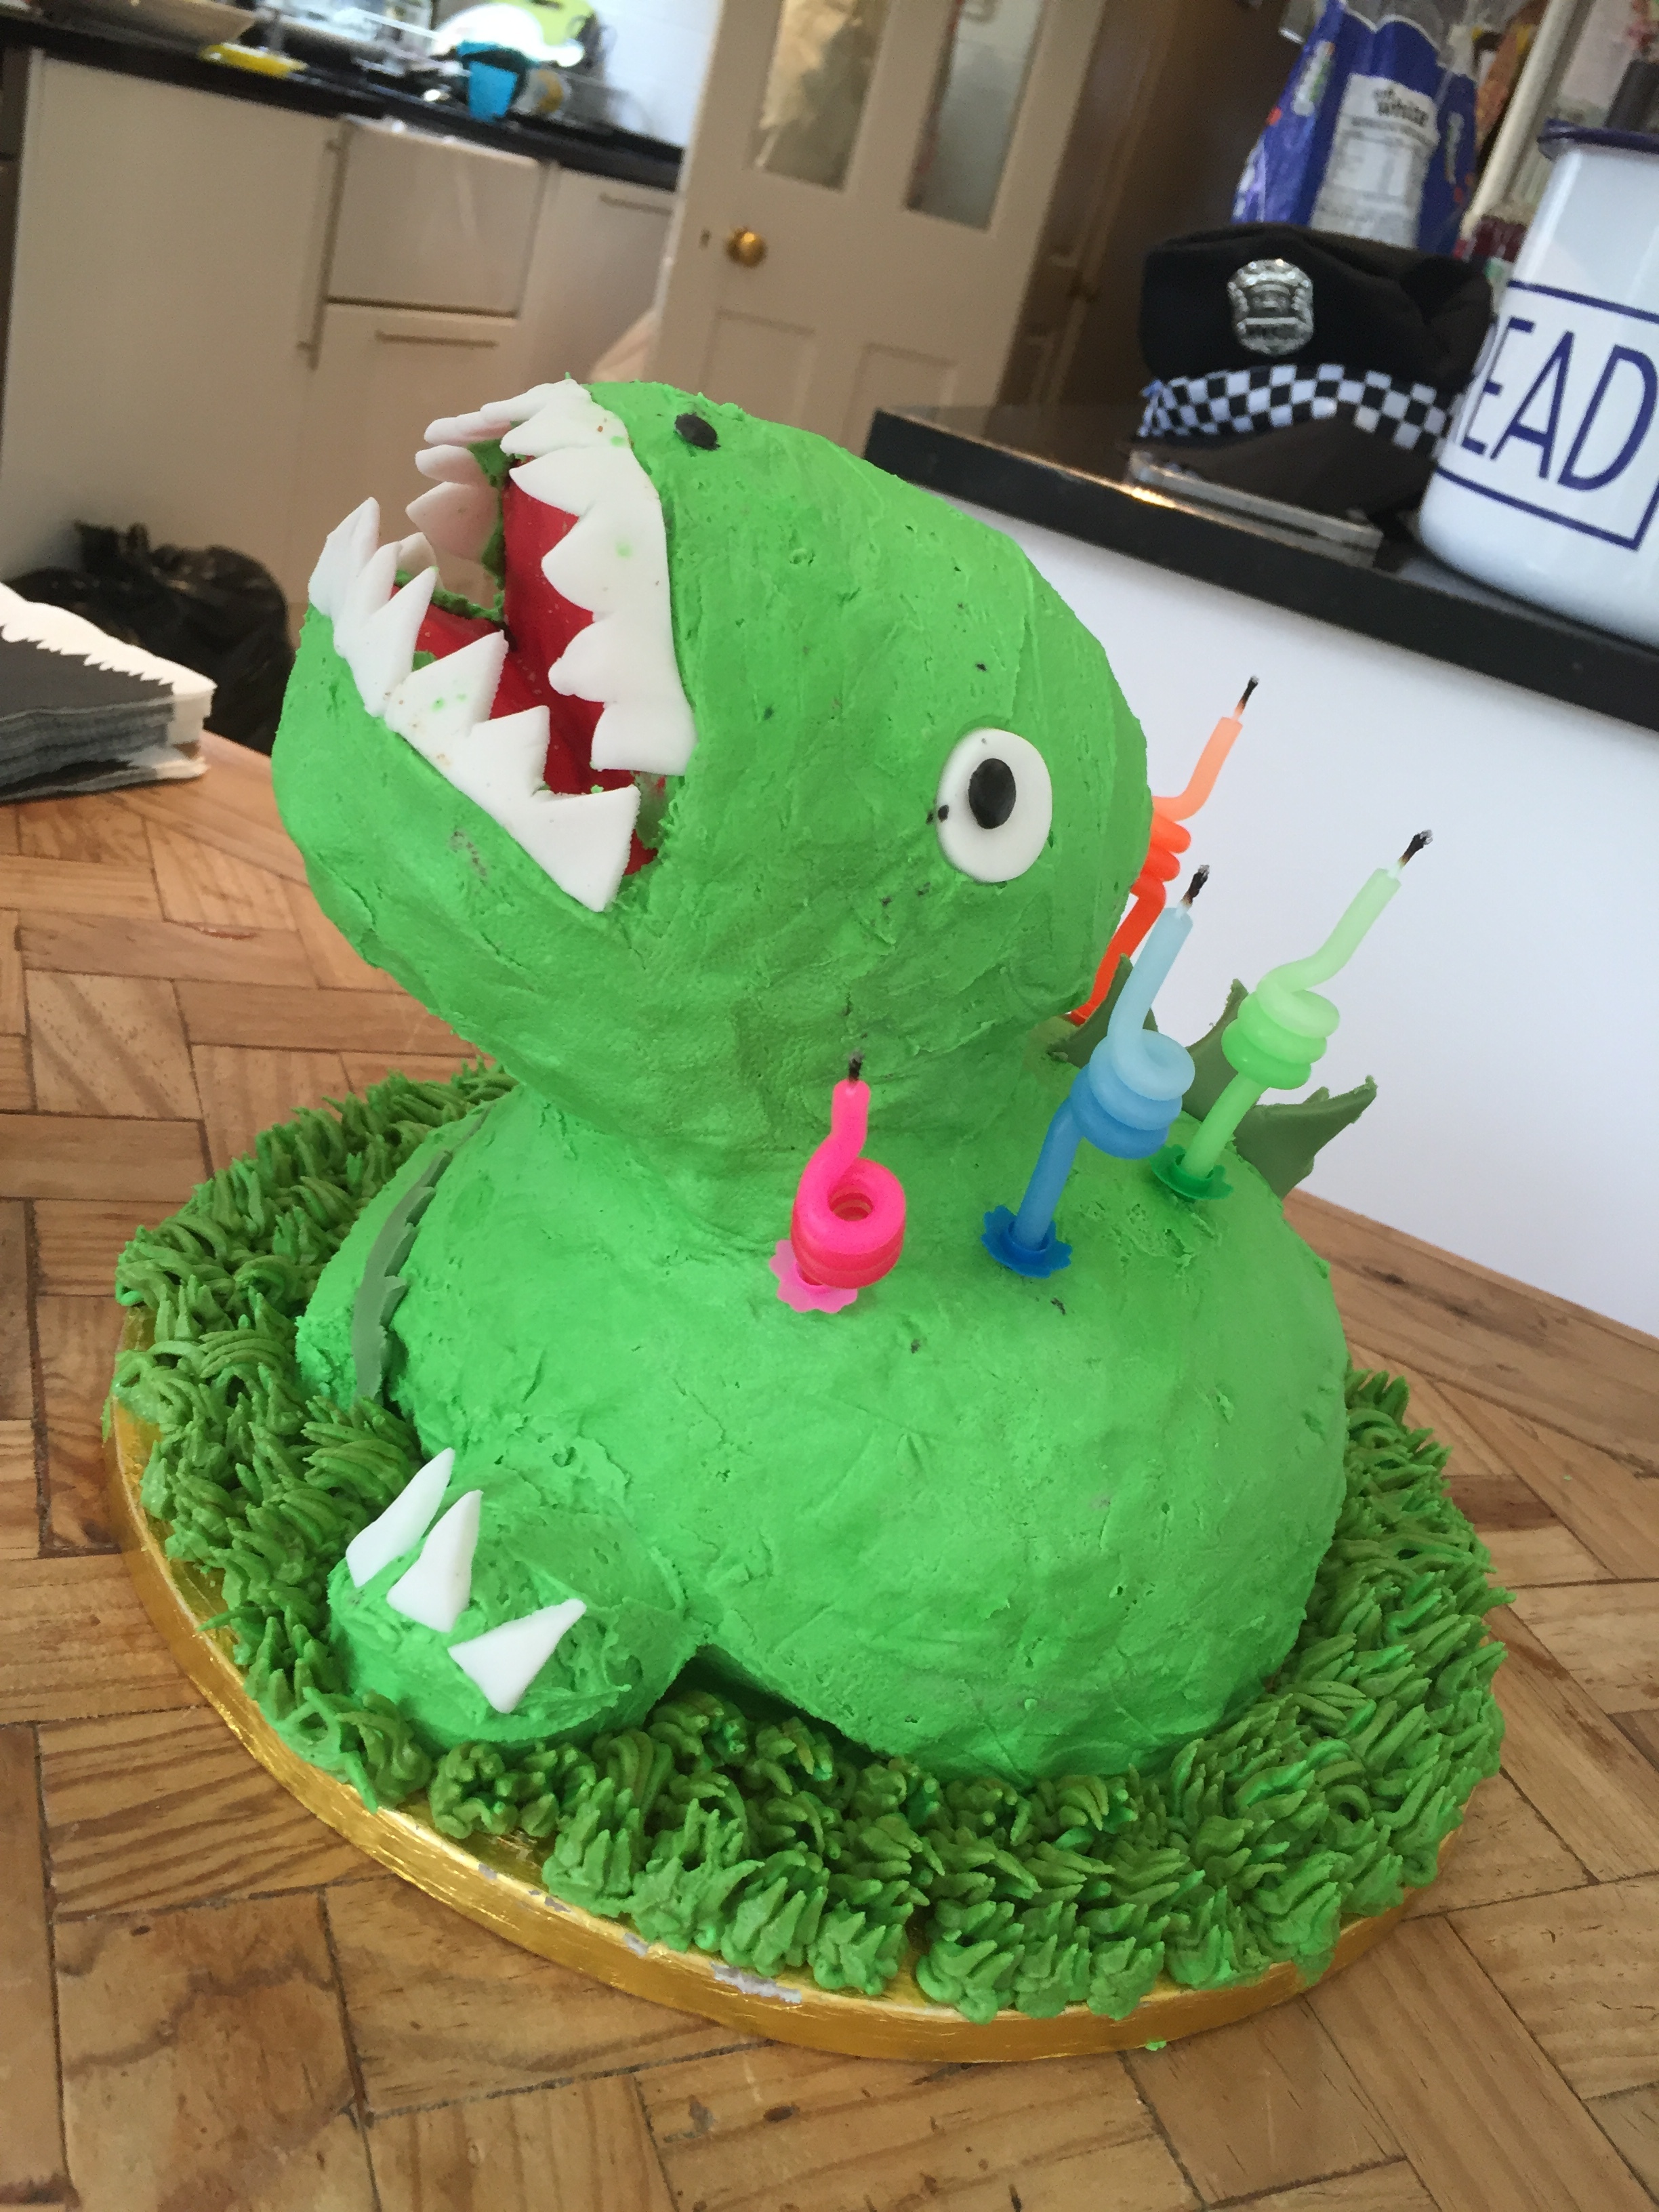
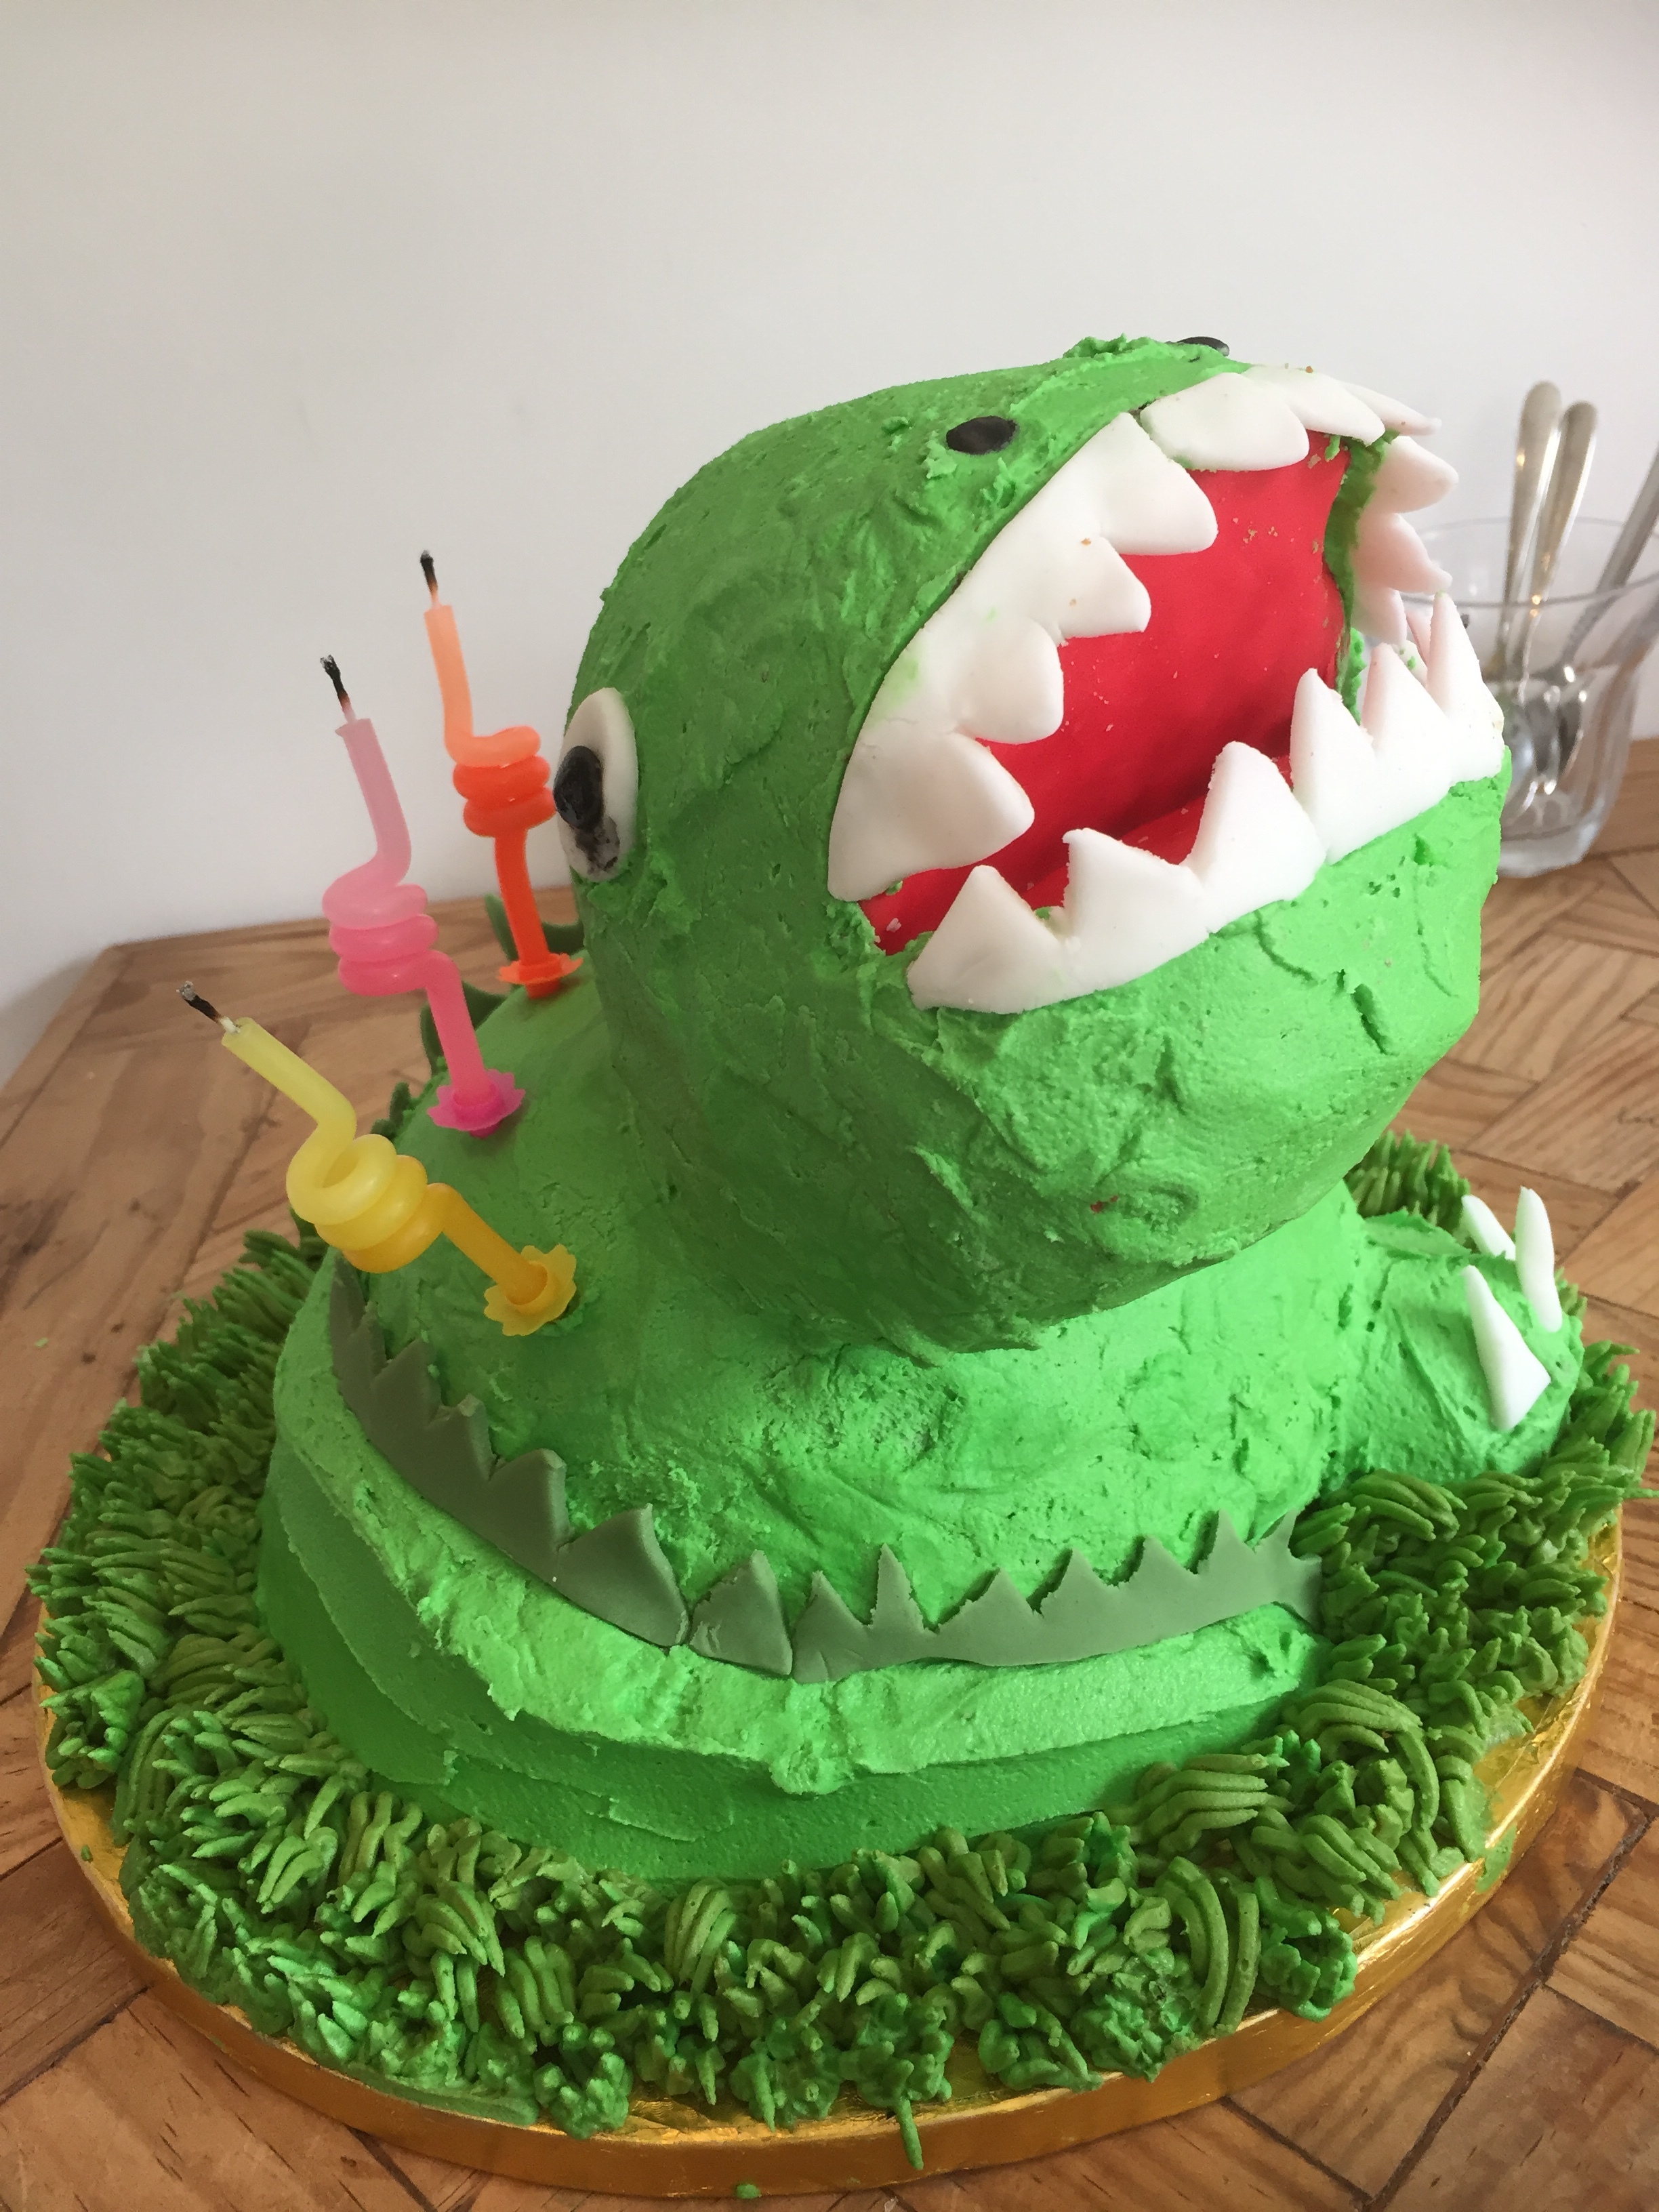
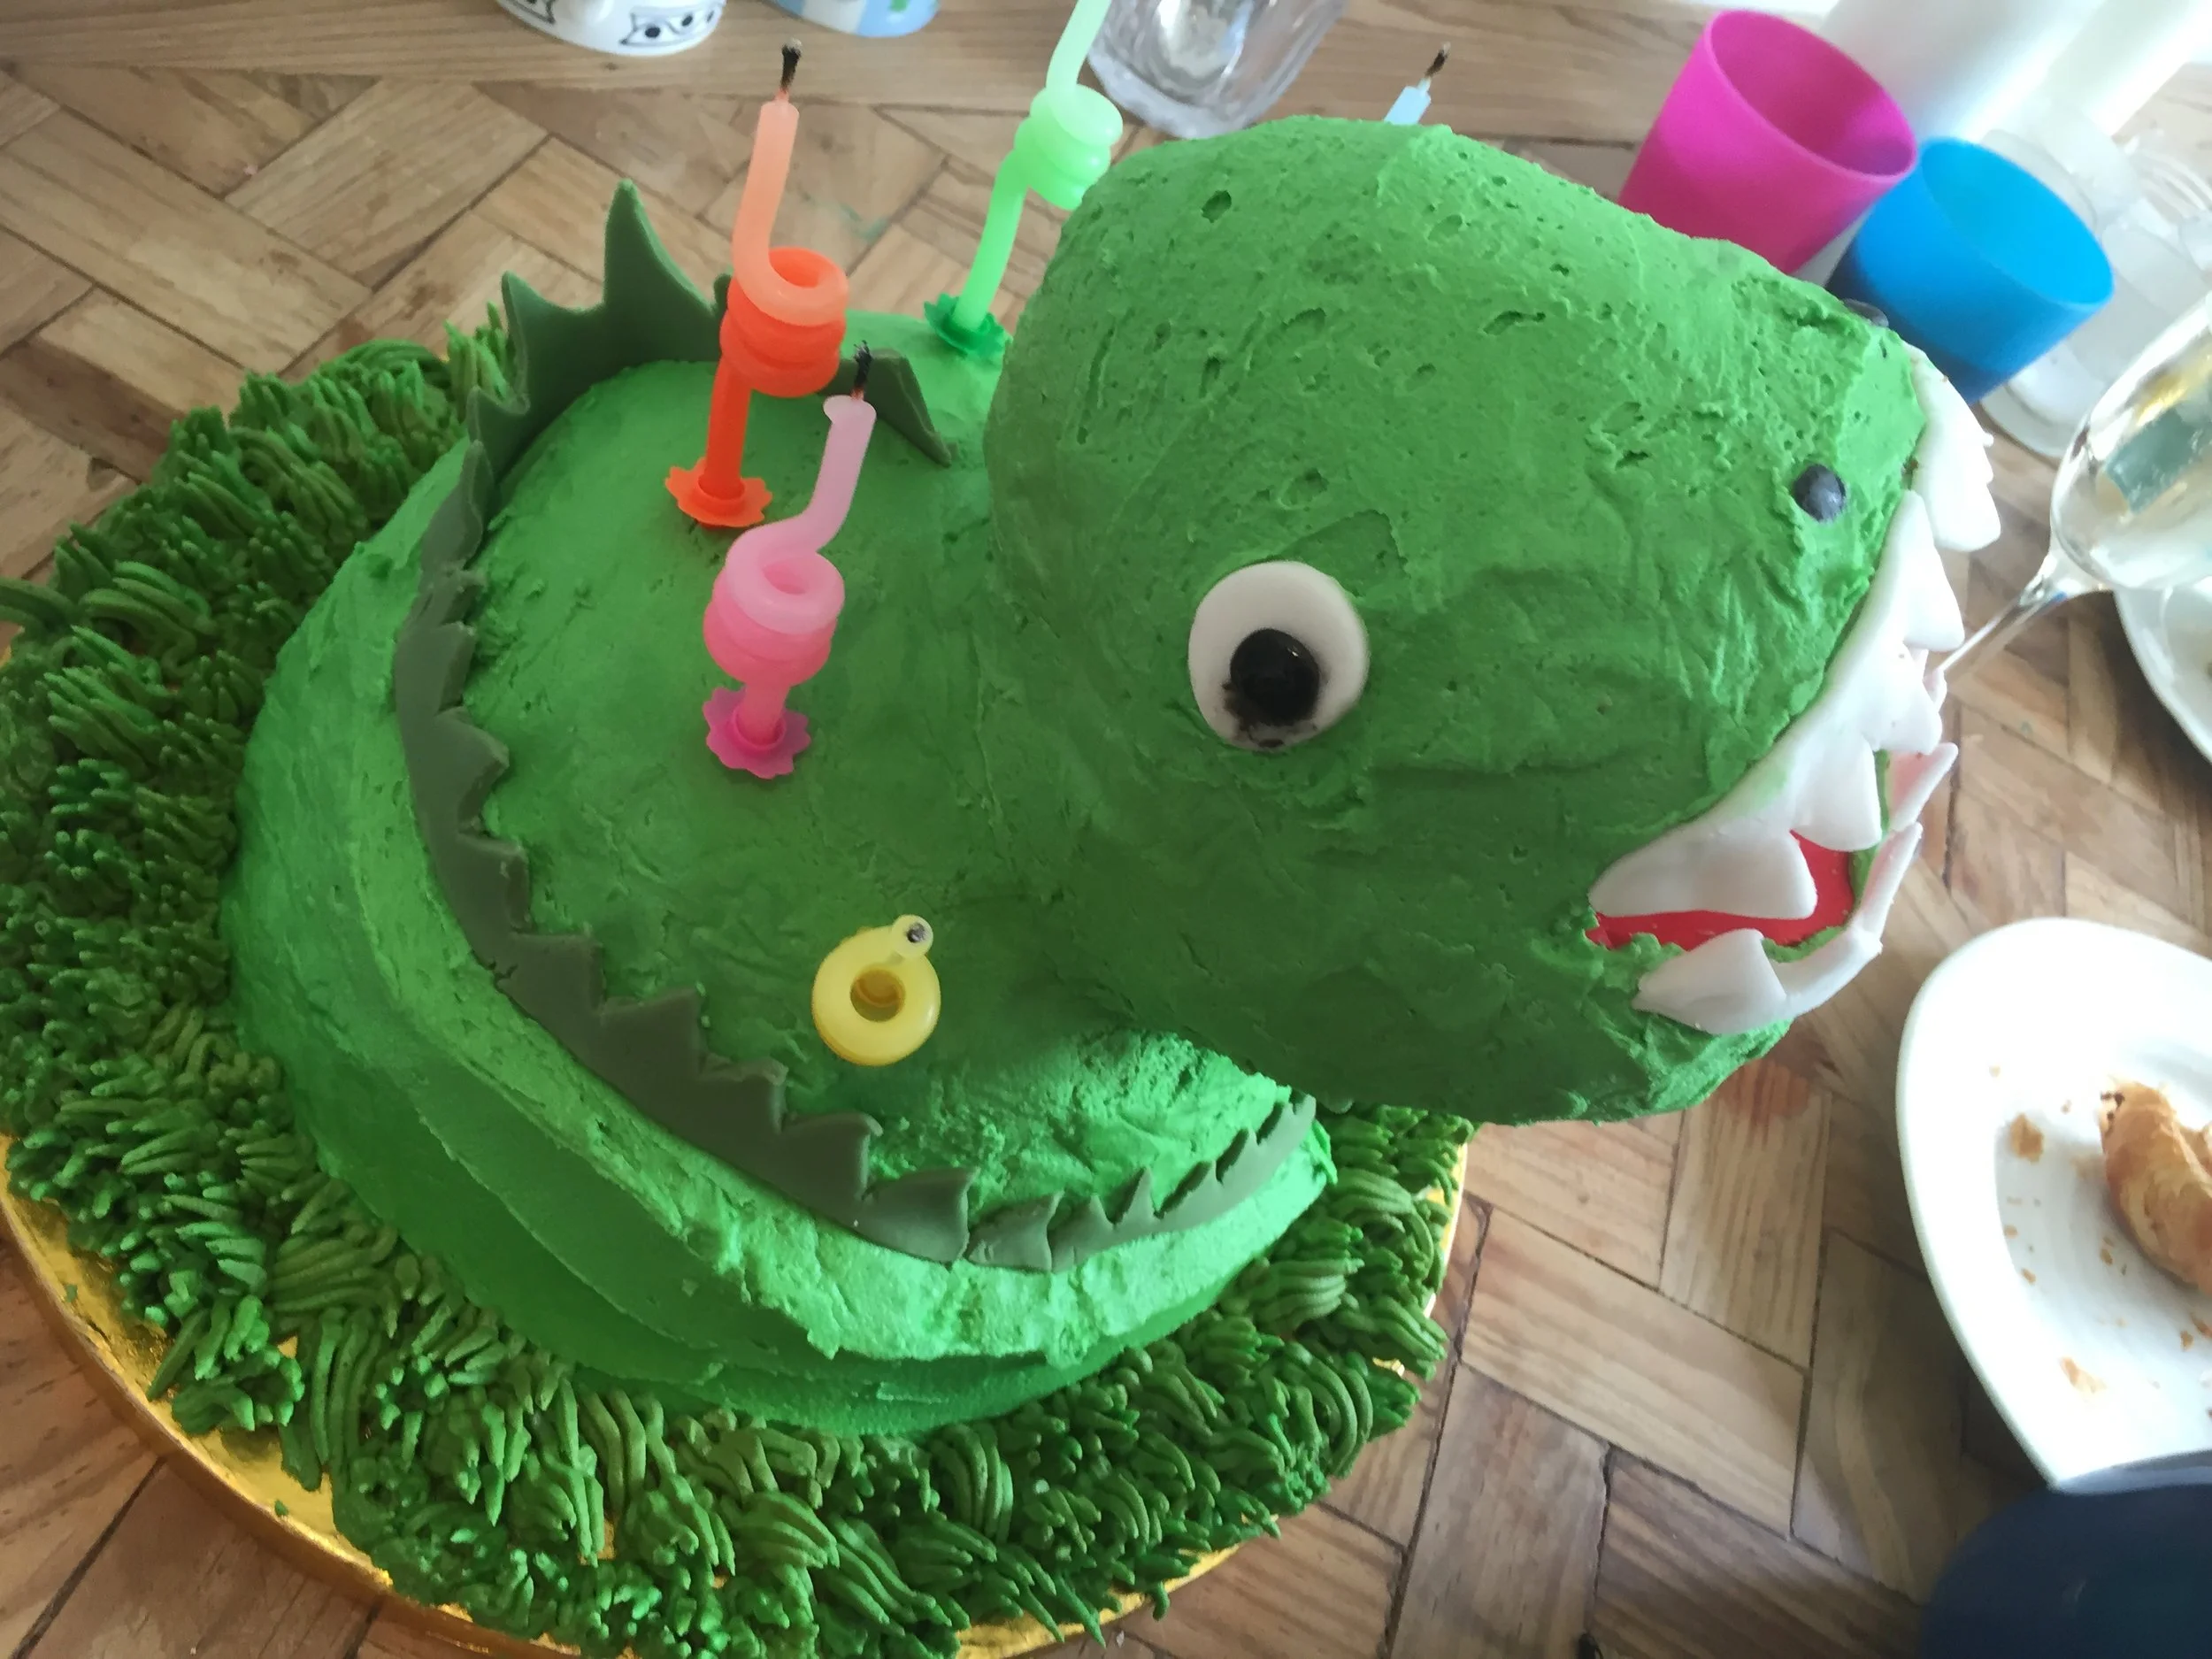
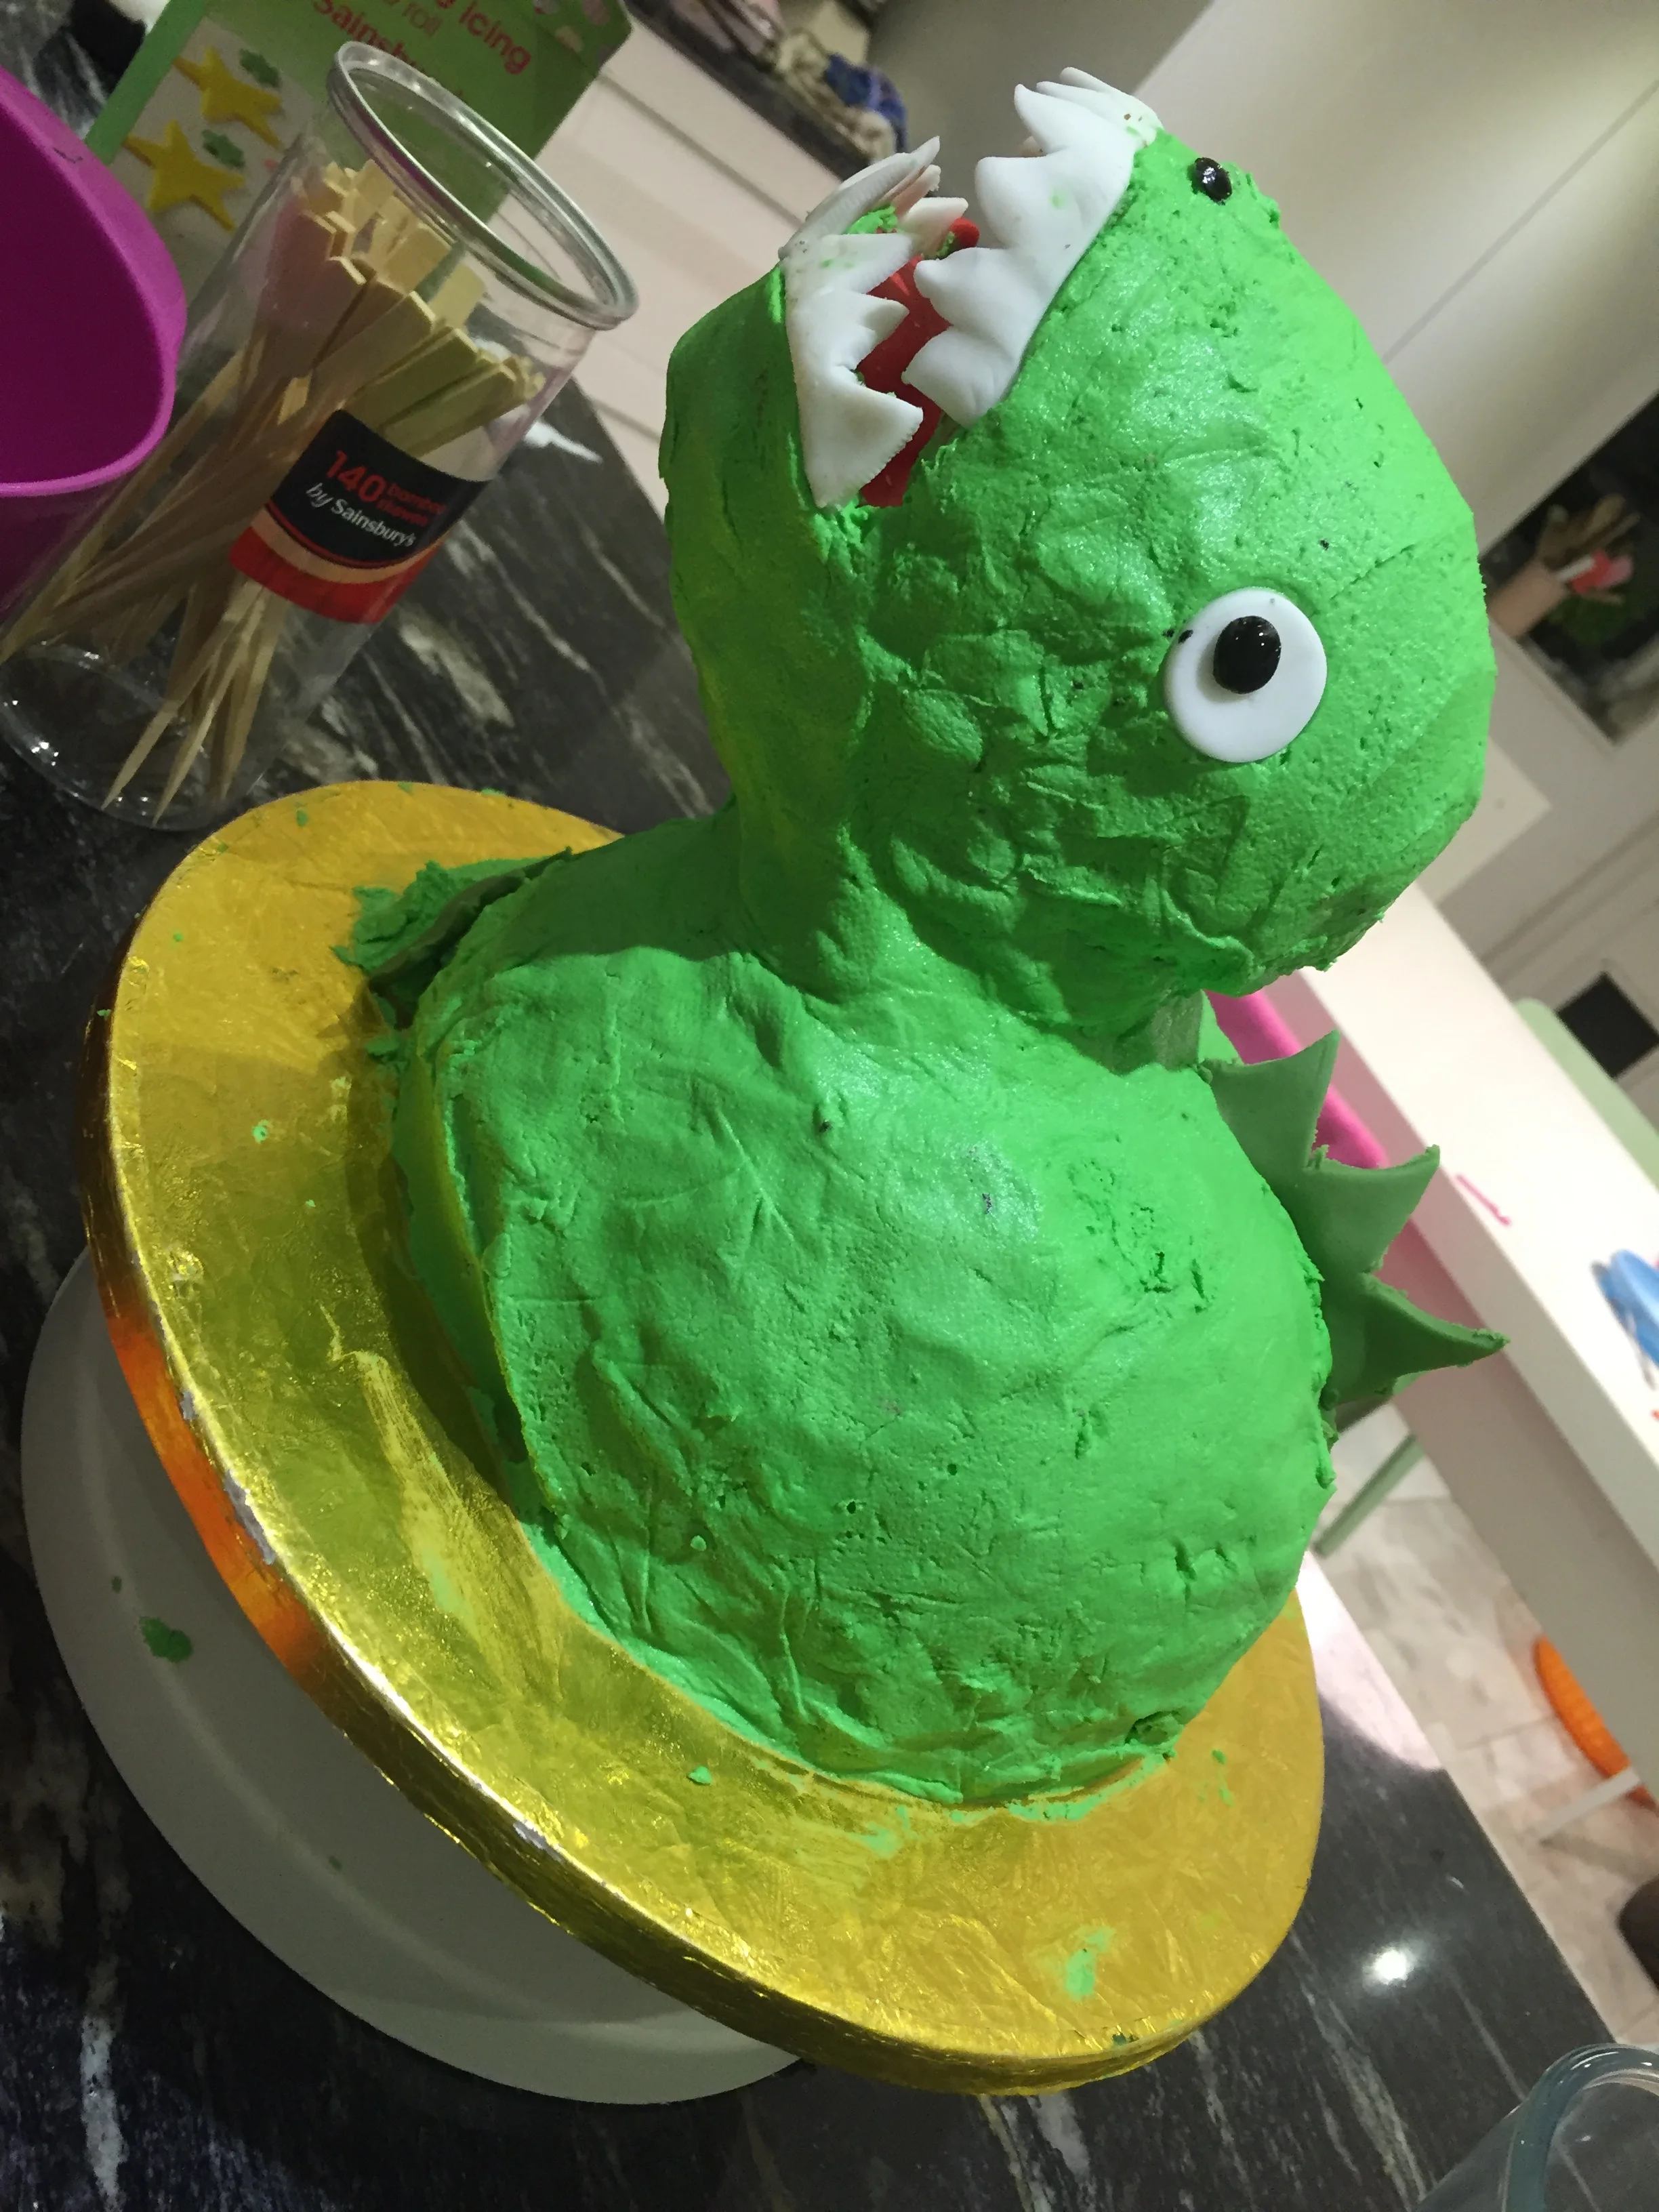
This was an idea I had for a dinosaur cake for my Godson Archies 6th birthday party.
It is a victoria sponge recipe which is what I mostly use for this kind of cake. I used a 10oz mix. It takes around 30-40 mins for the small cake to bake and 1hr to 80 mins for the large one. Remember that all oven temperatures vary whatever they say on the outside!
You will need to make around 1.5 kg buttercream. It is best to have too much rather than too little. You can keep any leftovers in a sealed container in the fridge for 3 weeks or the freezer for 3 months.
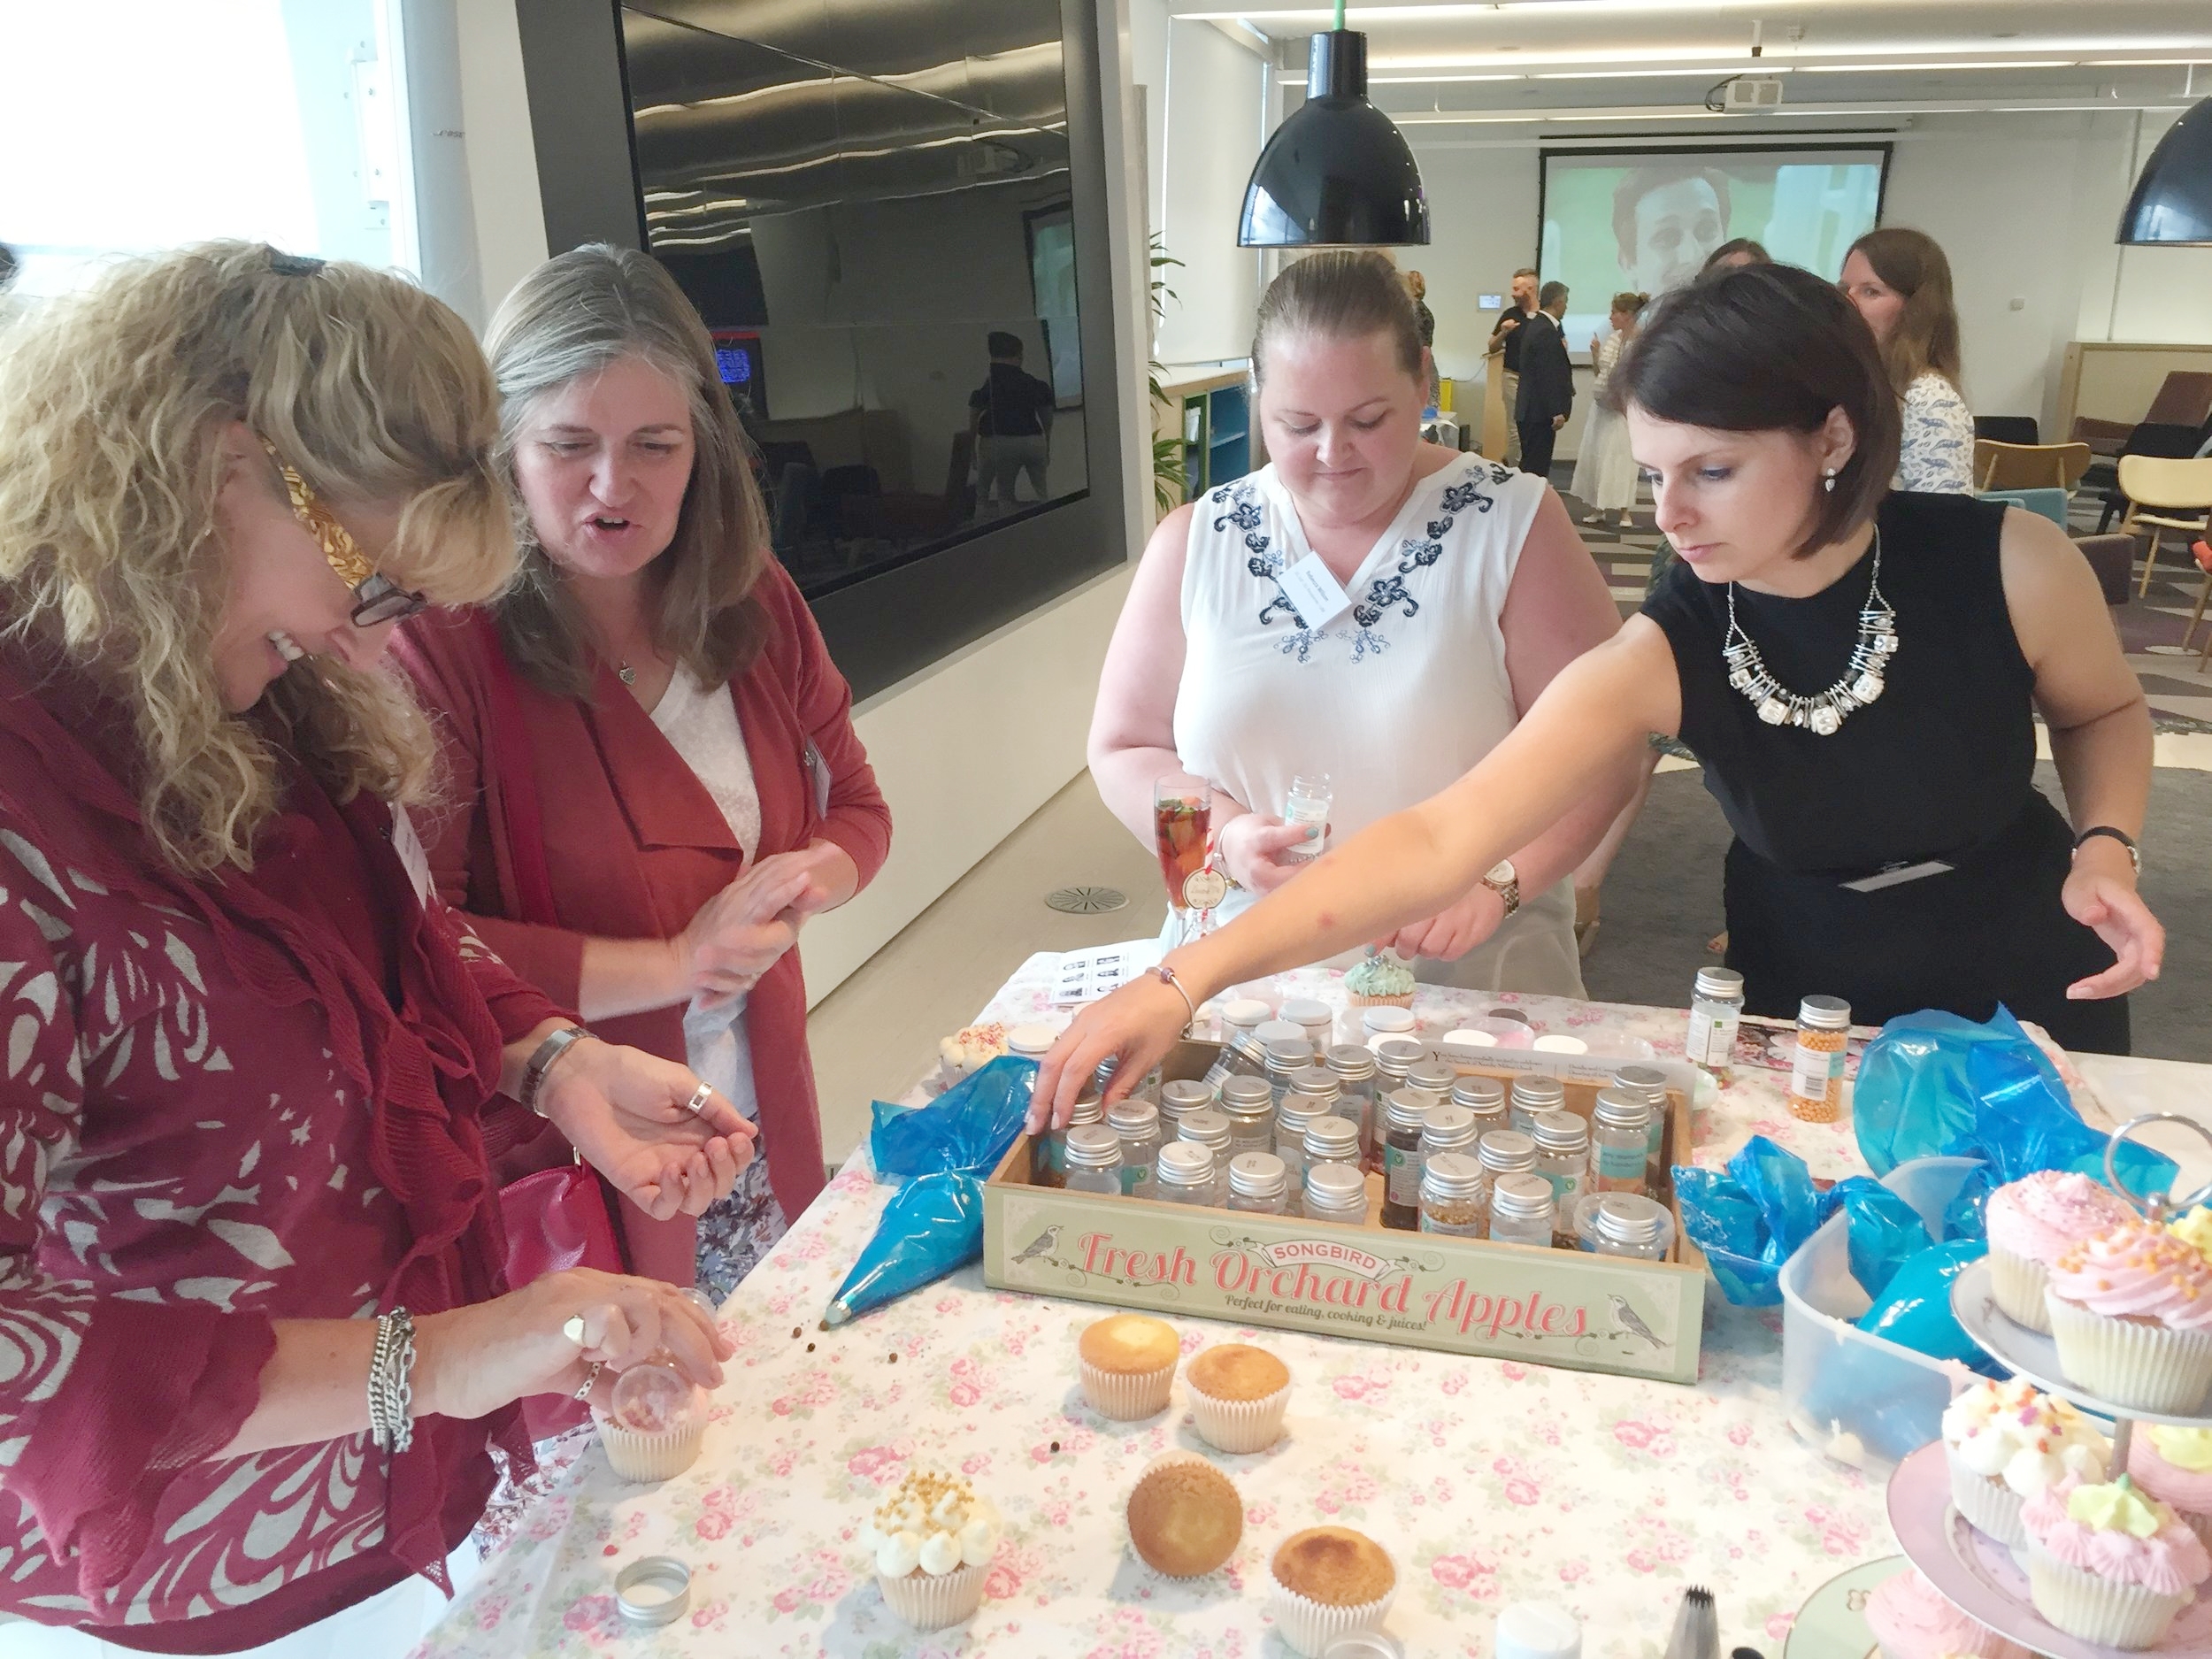
You will need
Green food colour, Wooden Skewers, White fondant icing, Green fondant icing, Red fondant icing, Black Fondant, Jam, Grass nozzle, Piping bag,
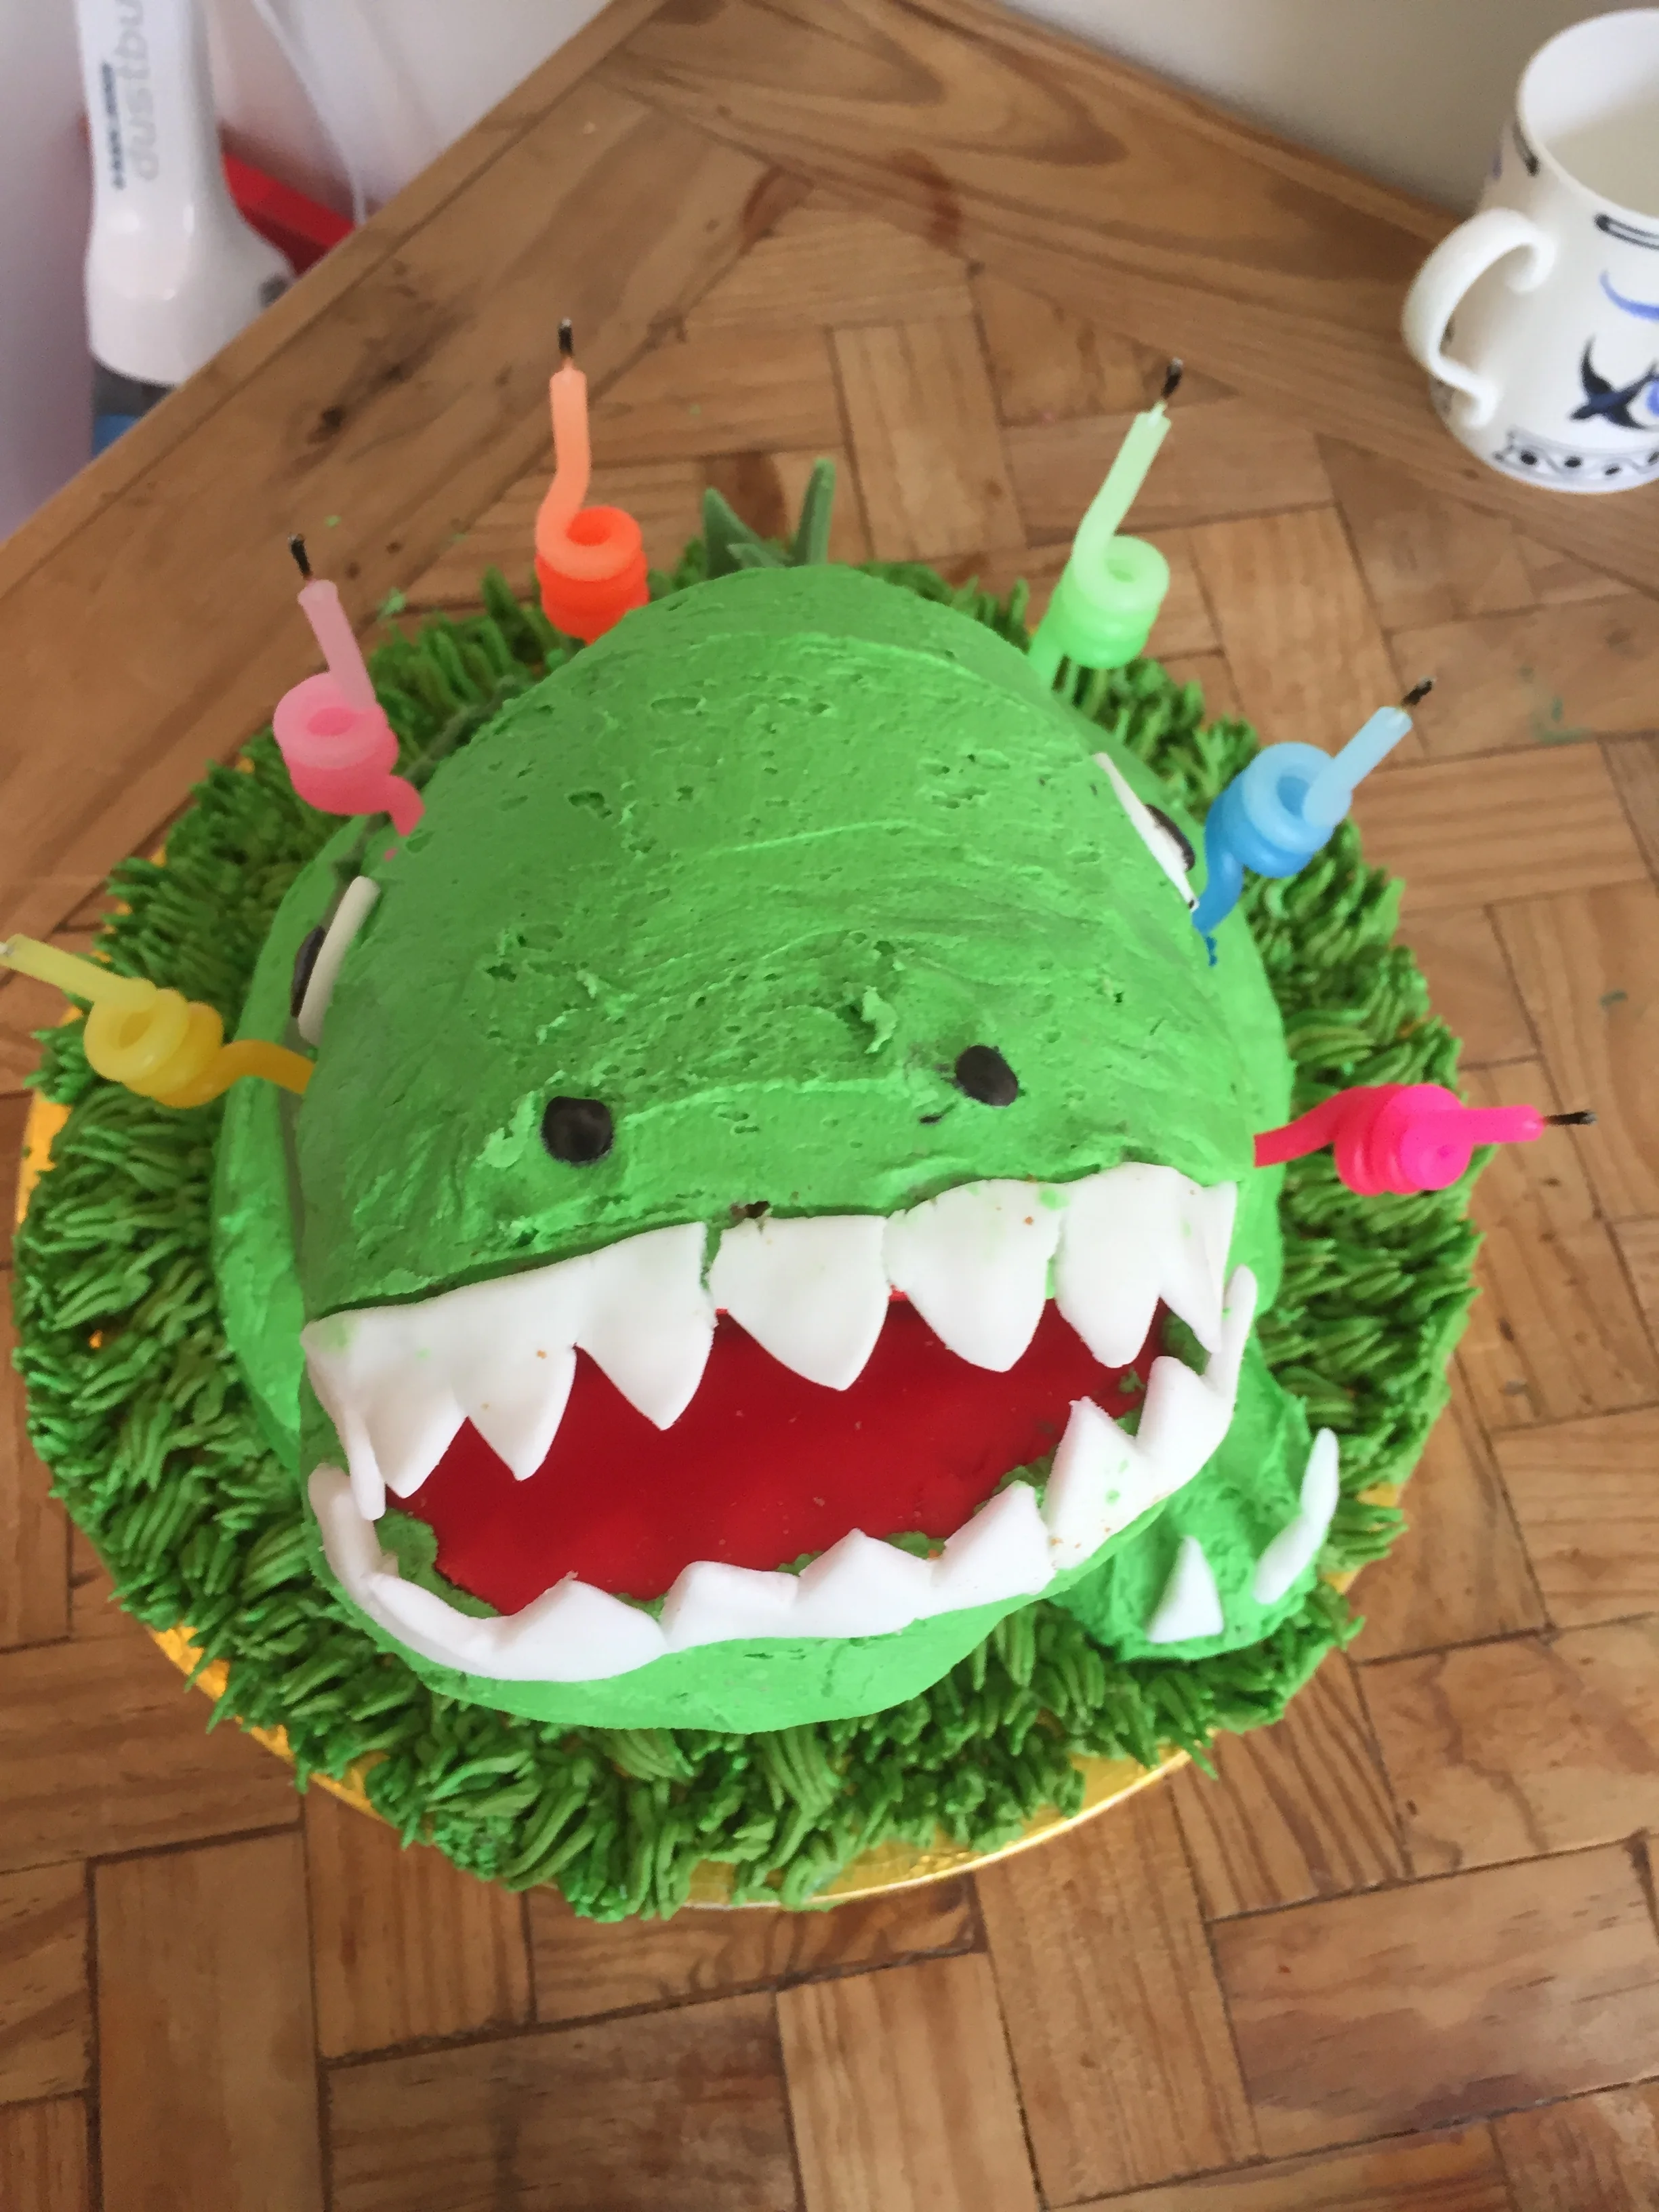
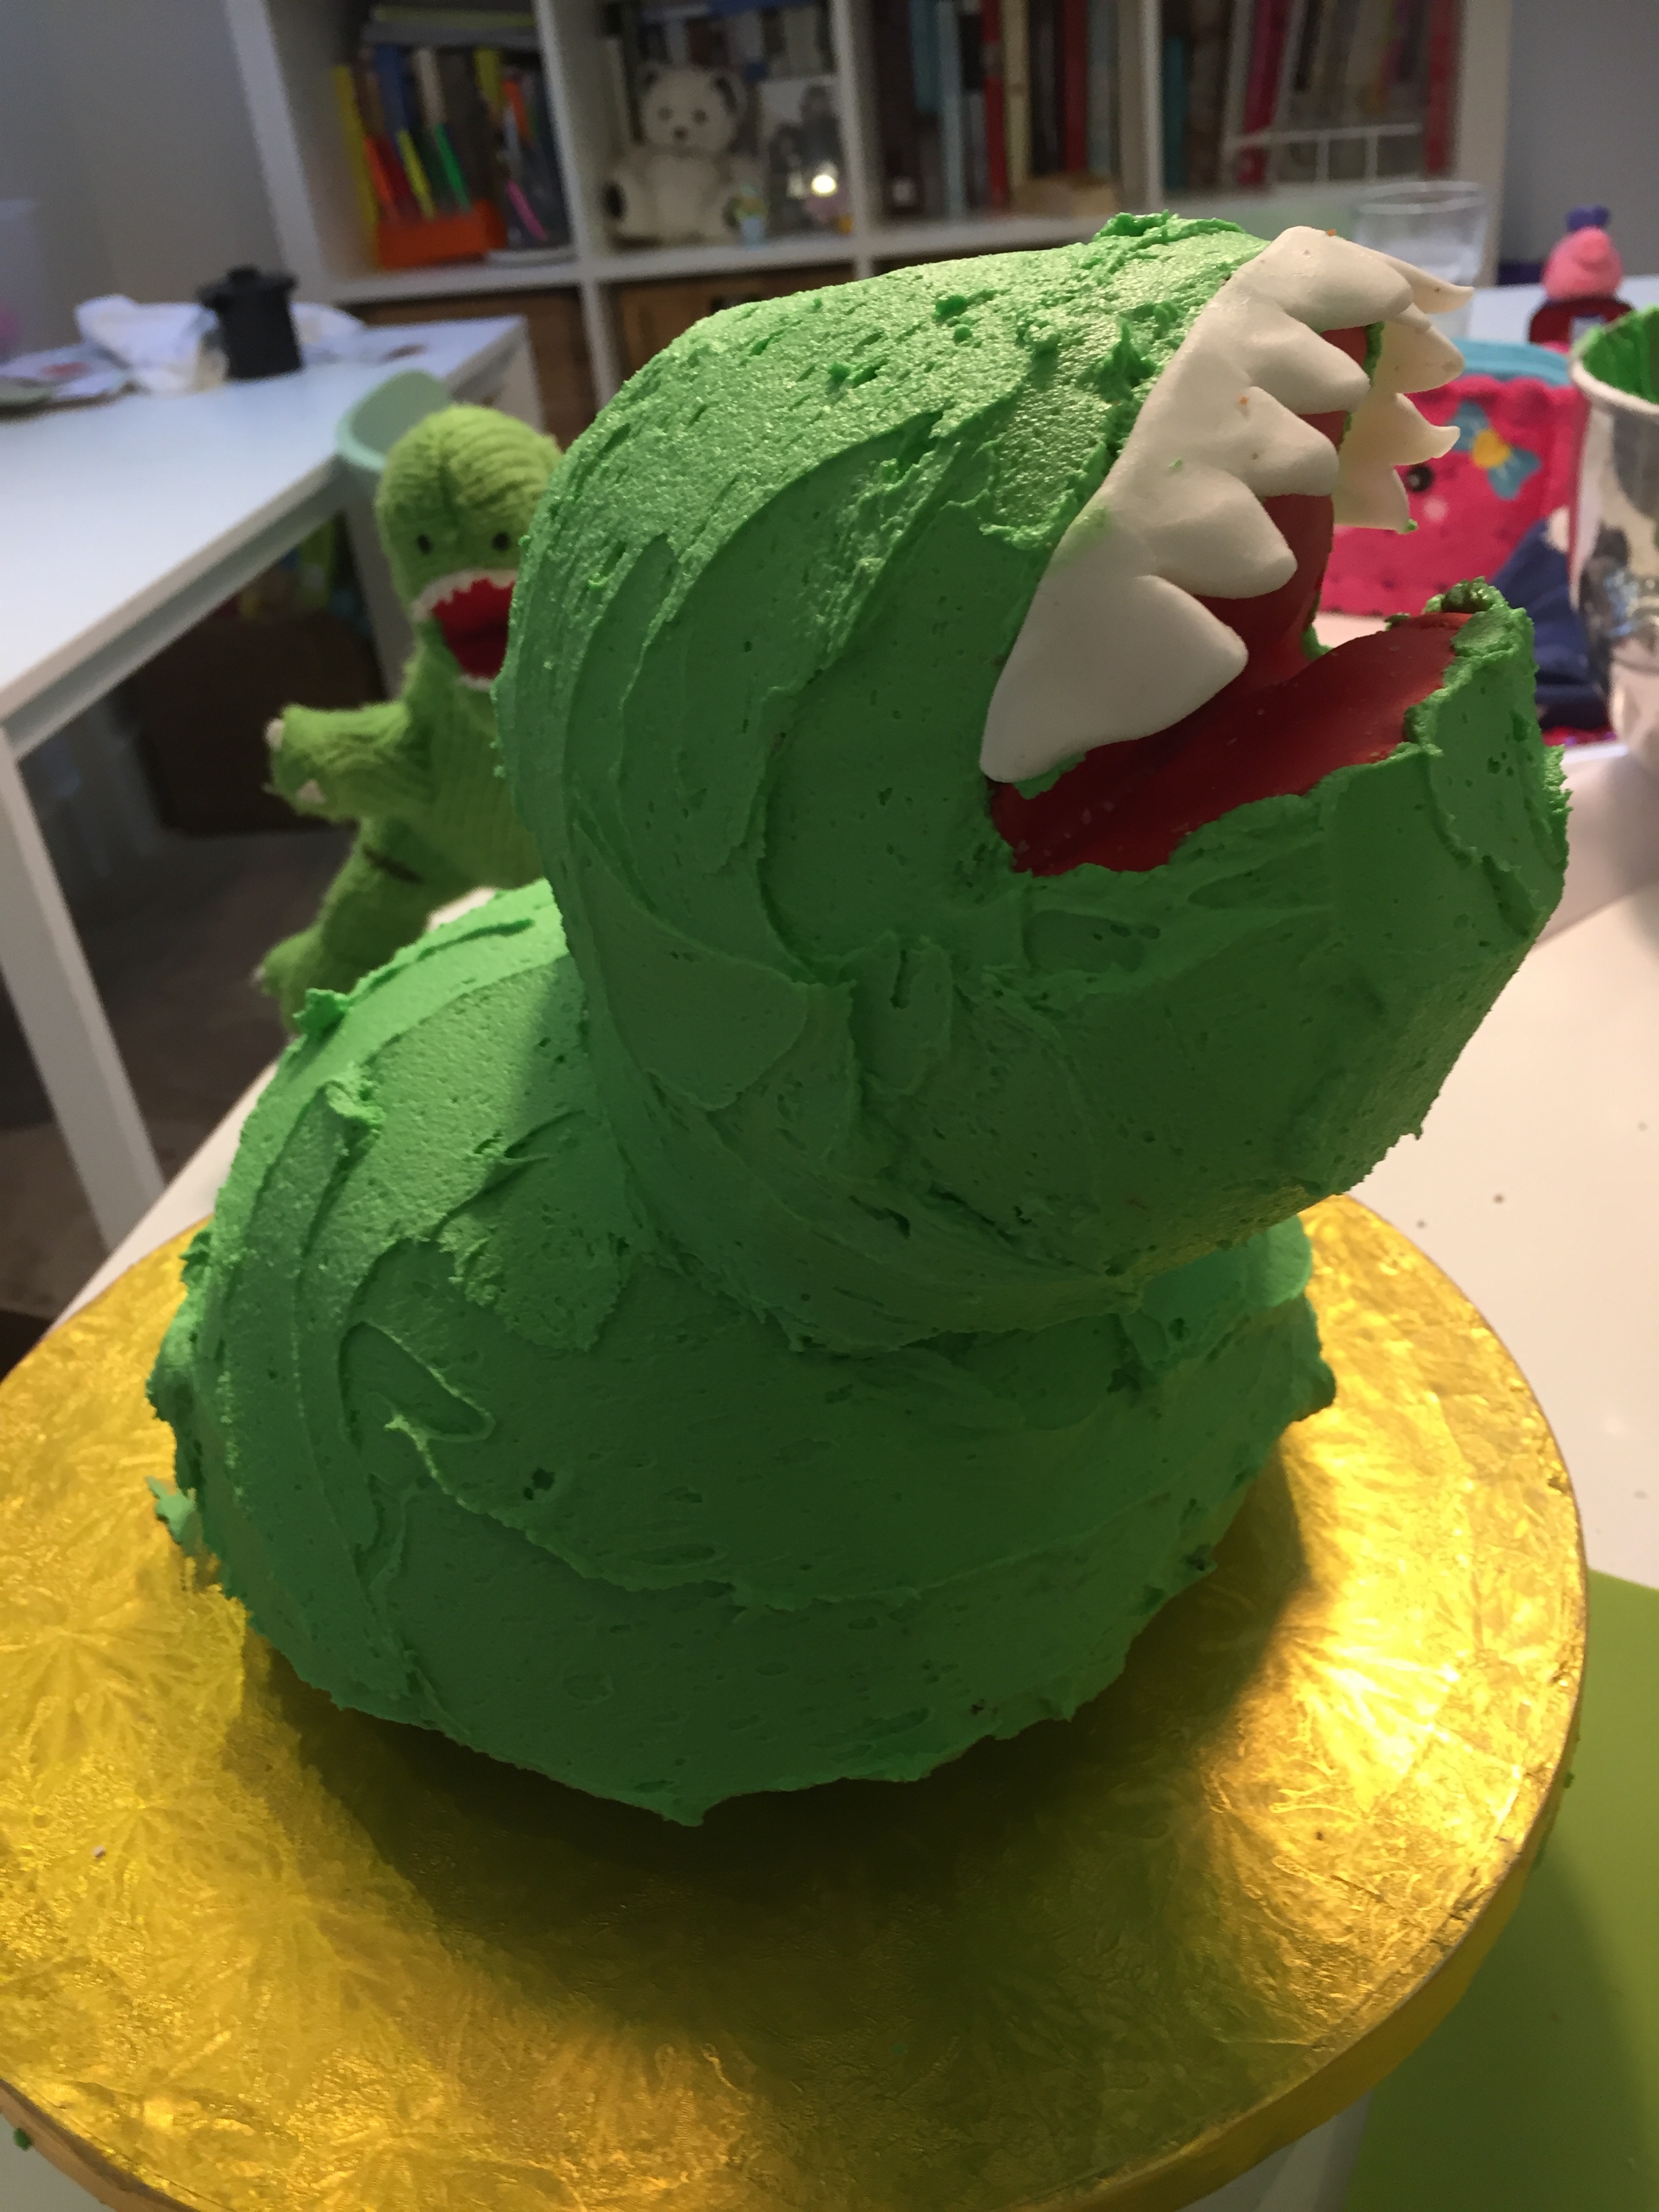
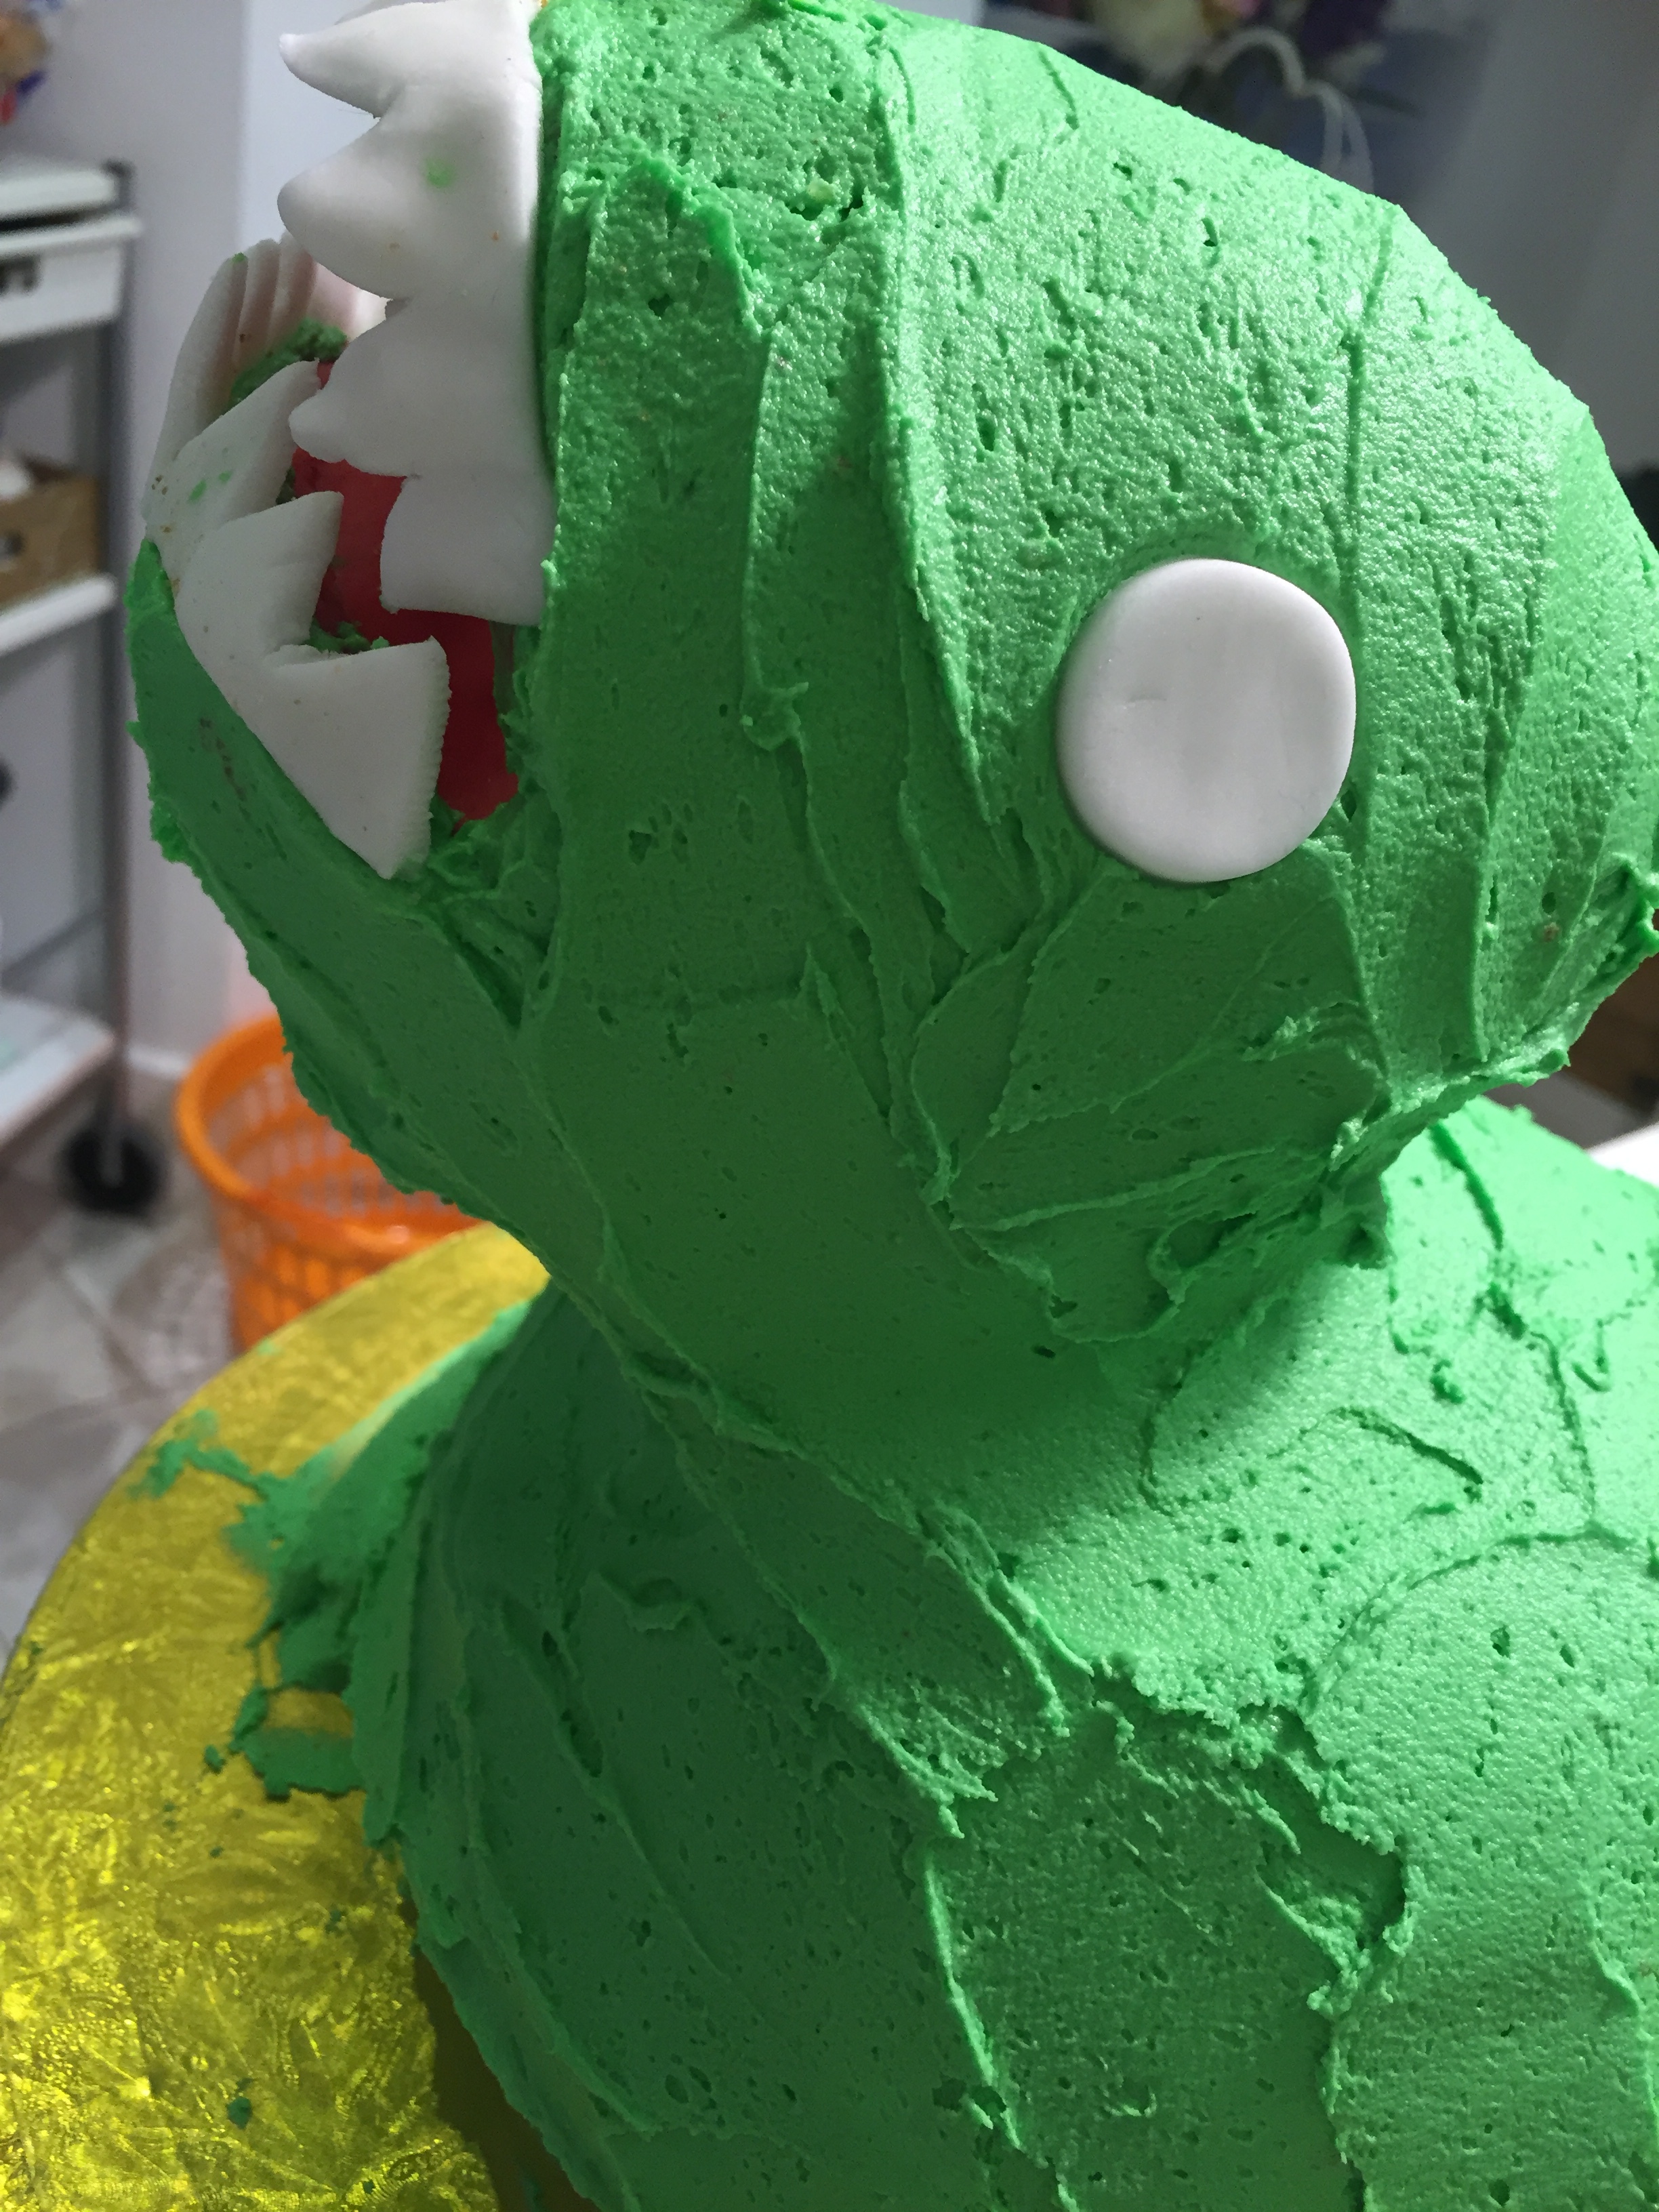
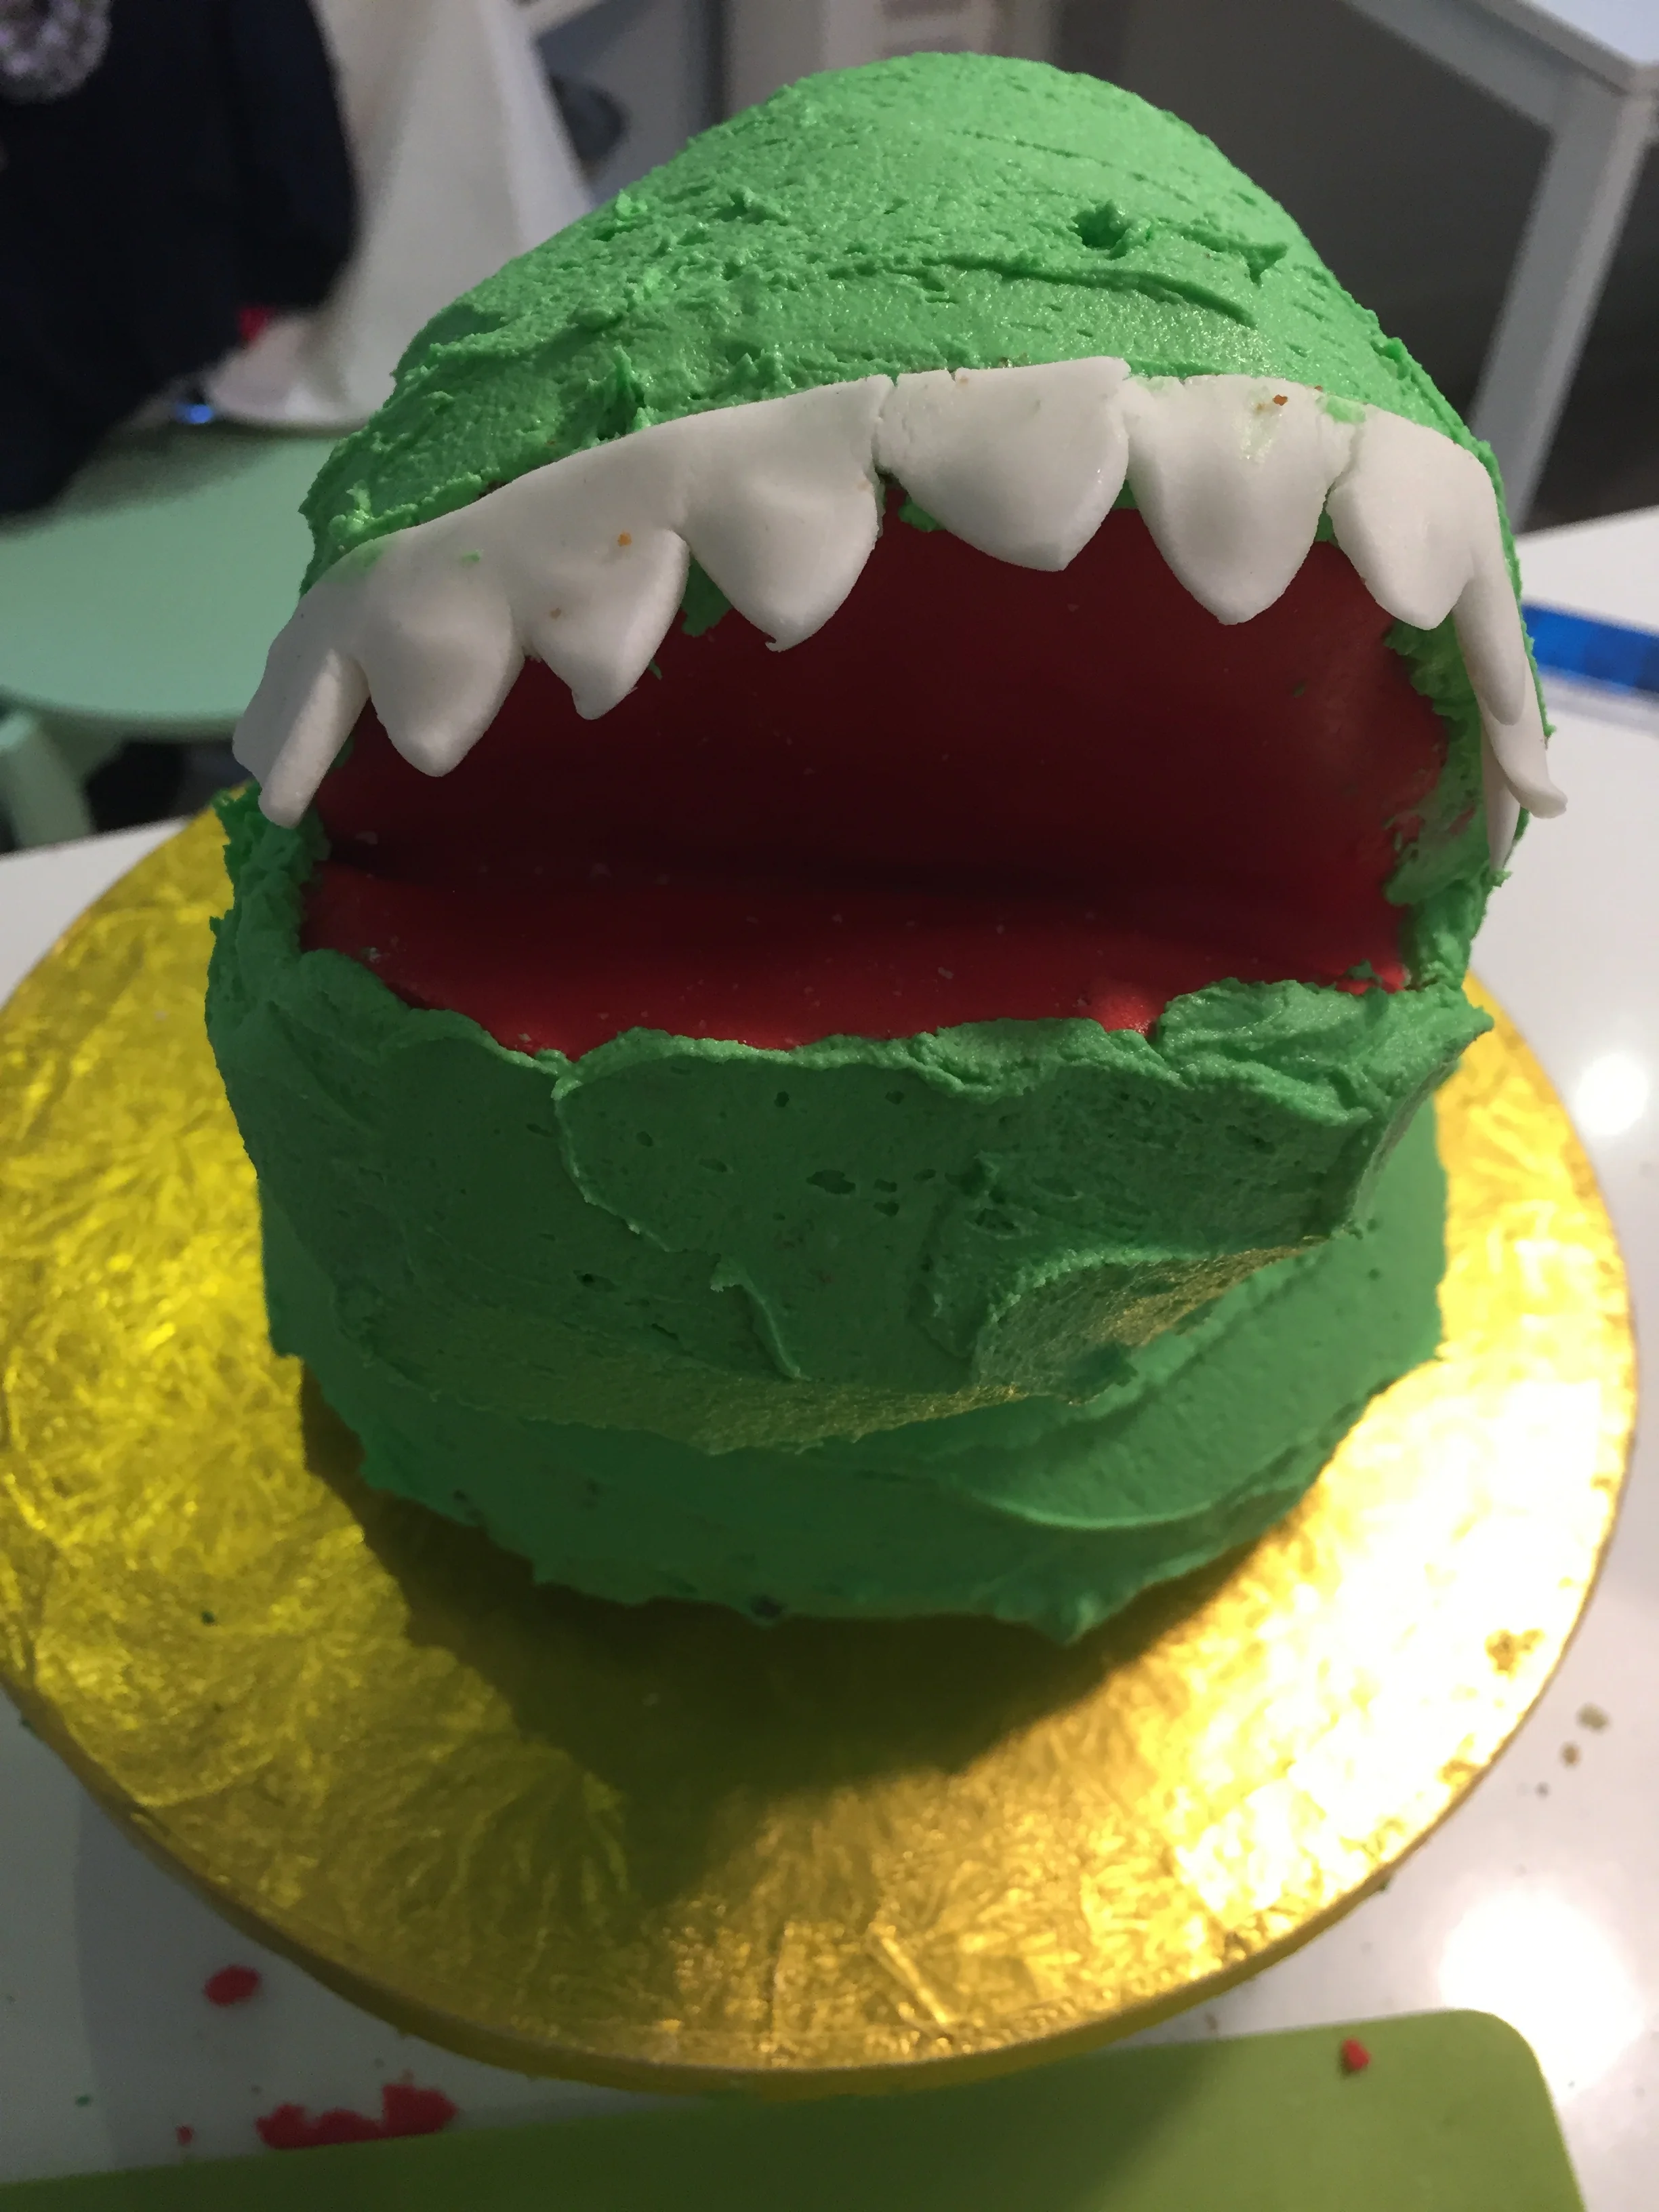
Once the cakes are baked and fully cooled secure the large one, flat side down (you may need to trim it) to a cake board with a dollop of buttercream. Now cut out a wedge from the smaller cake about 2 inches from the flat side. This will be the mouth. Cut an oval of rolled red fondant to the rough size of the wedge. Brush the inside of the wedge with warm jam and then press the oval piece of fondant into it. Trimming if necessary. Then attach the 'head' to the 'body of the dinosaur using wooden skewer applied at different angles to secure it. You will now need to build up the top of the head to create a dome shape. Use the buttercream to do this. Then, using a palette (or butter) knife, cover the whole thing with the green buttercream. You should create a kind of ridge on one side of the 'body' as this is where the tail will be.
Cut out a jagged strip from some rolled out green fondant (I did this freehand) and wrap round one side of the body to make the tail. Then do the same with the white fondant to make a set of teeth. These should stick onto the buttercream. Lastly make the white eyes and black irises using small round cutters (or the bottom of piping nozzles) and stick these in place. If you want you can also add a little red icing to look like blood on the teeth.
To finish of the cake I piped some green buttercream 'grass' onto the cake board to add some more texture.
Let me know how you get on or if you have any questions.
If you would like to create this or something similar in a one to one private lesson with me then call- 020 3573 9135
Biscuit Decorating for Stylist & Pinterest
I had so much fun creating the Neon Christmas Biscuits for the Stylist Magazine & Pinterest event. So I was thrilled to find out that they had chosen me to feature in there 'how to' videos for Christmas craft inspiration. Here are some pictures of the day including the lovely crew who shot it. You can see the end result here....